Dehydrator Recipes: Creative and Easy Ideas for Fruits, Veggies, and More
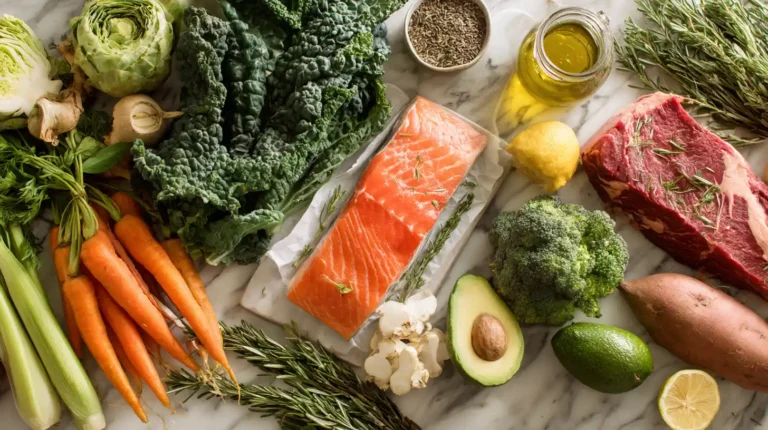
Food dehydrators have this weird reputation for being something only hardcore preppers or health nuts use. But honestly, they’re just practical kitchen tools that happen to make really good snacks. If you’ve ever paid seven dollars for a small bag of dried mango at the store, you’ll understand why having your dehydrator makes sense.
Dehydrating food isn’t complicated. You’re basically just removing water so things last longer and taste more concentrated. The process takes time, but it doesn’t require much effort. Set it up, walk away, and come back hours later to perfectly dried food. It’s like slow cooking but with an entirely different result.
How Dehydration Works
A dehydrator circulates warm air around food to evaporate moisture. Most models have stackable trays and a fan that keeps air moving. Temperature controls let you adjust heat depending on what you’re drying. Fruits typically need around 135 degrees Fahrenheit, vegetables and herbs work at lower temps, and meats require higher heat for safety.
The lack of moisture is what preserves food. Bacteria, mold, and yeast need water to grow, so removing it stops spoilage. You’re not cooking the food in the traditional sense, though some enzymatic changes happen at these temperatures. Most nutrients stay intact, which makes dehydrated foods pretty nutritious compared to other preservation methods.
Why Bother Dehydrating
Store-bought dried snacks are expensive and often loaded with added sugar or preservatives. Making your own means you control exactly what goes into them. Plain dried fruit without any additives tastes cleaner and often sweeter than you’d expect because the sugars concentrate as water evaporates.
It’s also practical for dealing with excess produce. If your garden produces more tomatoes or zucchini than you can eat fresh, dehydrating preserves them for months. Seasonal fruit that’s cheap and abundant in the summer becomes a winter snack without taking up freezer space. For more ways to preserve fresh ingredients, refer to these chicken and potato recipes that work well with dehydrated vegetables.
Dehydrated meals are more portable and lighter than canned goods for camping and hiking. You can make entire dinners that rehydrate with just hot water, which beats carrying heavy jars or dealing with spoilage on multi-day trips.
Choosing a Dehydrator
Not all dehydrators are the same. Stackable tray models are cheaper and work fine for occasional use, but they often have uneven heat distribution. The trays near the heating element dry faster than the ones at the top, which means rotating them during the process.
Box-style dehydrators with horizontal airflow cost more but dry food more evenly. They’re worth it if you plan to dehydrate regularly. Look for adjustable temperature controls rather than a single fixed setting; different foods need different temperatures for best results.
Size matters depending on how much you’ll use it. A four-tray model is fine for small batches, but if you’re processing large harvests or making meals for camping trips, you’ll want at least six to nine trays. Some models let you add extra trays later, which gives you flexibility as you figure out how much capacity you actually need.

Basic Equipment
Besides the dehydrator itself, you don’t need much. A sharp knife or mandoline slicer helps create uniform pieces, which dry more evenly than random-sized chunks. Cutting boards are obviously essential. Parchment paper or reusable liners prevent sticky foods like fruit leather from welding themselves to the trays.
Airtight containers or vacuum-seal bags are essential for storage. If not properly sealed, dehydrated food can reabsorb moisture from the air, negating its intended purpose. Mason jars work well for things you’ll use quickly. For long-term storage, vacuum sealing is better.
A food processor is helpful if you want to make fruit leather or powders from dried vegetables and herbs. Otherwise, you can manage with basic kitchen tools most people already have.
Fruit Leather
Fruit leather is probably the easiest dehydrator recipe to start with. It’s just pureed fruit spread thin and dried until it’s pliable. You can use almost any fruit, fresh or frozen. Strawberries, mangoes, apples, peaches, and berries—they all work.
Blend the fruit until smooth. If it’s too thick to spread easily, add a little water or juice. If it’s too watery, simmer it on the stove first to reduce some liquid. Pour it onto lined dehydrator trays and spread it evenly, about a quarter inch thick. Thinner spots will dry faster and might get brittle, while thick spots stay tacky longer.
Dry at 135 degrees for six to eight hours. It’s done when the surface isn’t sticky anymore and peels off the liner easily. Some people add honey or lemon juice for extra flavor, but plain fruit leather is already sweet enough from the concentrated sugars.
Cut it into strips and roll them up for storage. Kids like it, adults like it, and it packs well for lunches or road trips without needing refrigeration.
Vegetable Chips
Vegetable chips are a healthier alternative to potato chips and way cheaper than the fancy ones at health food stores. Kale, zucchini, sweet potatoes, beets, and even carrots work well. Slice them thin and uniform; a mandoline makes this easier, but a sharp knife works if you’re careful.
Toss the slices with a tiny bit of olive oil and whatever seasoning you like. Salt and pepper are classic. Garlic powder, paprika, or nutritional yeast add variety. Don’t use too much oil, or they’ll take forever to dry and might turn out greasy instead of crispy.
Arrange them in a single layer on the trays without overlapping. Dry at 125 degrees for eight to ten hours, checking occasionally. They should be completely crispy when done. If they’re still flexible, they need more time. Kale chips dry faster than root vegetables because they’re thinner.
Store them in airtight containers. They can get soft in humidity, but putting them back in the dehydrator for an hour fixes it.
Jerky
Homemade jerky is way better than the tough jerky sold at gas stations. Use lean meat; beef or turkey works well, though chicken is an option too. Fat doesn’t dehydrate properly and can go rancid, so trim as much as possible before slicing.
Slice the meat thin, about a quarter of an inch, against the grain so it’s easier to chew. Freeze it partially first to make slicing easier. Marinate it for at least six hours; overnight is better. A basic marinade might be soy sauce, Worcestershire sauce, garlic powder, black pepper, and maybe a little honey or brown sugar for sweetness.
Lay the strips flat on the dehydrator trays. Dry at 160 degrees for four to six hours until it bends without breaking but doesn’t feel moist. The higher temperature is important for food safety with meat. Let it cool completely before storing. If you notice any moisture beading up in the container after a day, dry it longer.
Jerky lasts months in airtight containers and makes a protein-packed snack that doesn’t need refrigeration. It’s perfect for hiking or just keeping around for when you want something savory.

Herbs and Spices
If you grow herbs, dehydrating them preserves the harvest without taking up space in the freezer. Basil, parsley, cilantro, thyme, and oregano all dry well. Wash and pat them dry, then lay them on the trays in a single layer.
Use low heat, around 95 to 115 degrees, so the essential oils don’t evaporate. Higher temps will dry them faster but reduce flavor. They’re done when the leaves crumble easily, usually two to four hours depending on the herb.
Strip the leaves from the stems and store them whole or crush them into smaller pieces. Dried herbs are more concentrated than fresh, so you need less when cooking. A jar of home-dried oregano or basil makes a practical gift if you’re looking for something homemade to give people.
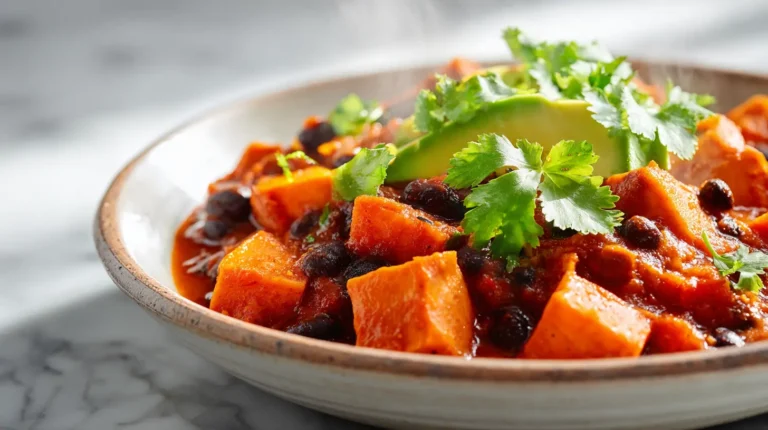
Dehydrated Meals
Dehydrating complete meals takes more planning but works excellently for camping. Cook whatever you want—soup, chili, or pasta with sauce—then spread it thin on the trays and dry it completely. It’ll look weird and unappetizing when dried, but it rehydrates surprisingly well.
Break the dried food into pieces and store it in labeled bags. On the trail, just add hot water and wait ten to fifteen minutes. The food rehydrates, and you have a hot meal without carrying heavy cans or dealing with spoilage. For more meal prep ideas, explore these low-sodium recipes that work well dehydrated.
Rice and beans dry well separately. Cooked ground meat or turkey can be crumbled and dried. Vegetables obviously work. Cheese is trickier because of the fat content, but low-fat varieties can be dried if you’re careful. Experiment at home before relying on it for a trip.
Seasonal Preserving
Dehydrating is perfect for dealing with seasonal gluts of produce. Summer tomatoes can be dried and stored for winter soups and sauces. Fall apples turn into chips or leather that last until spring. Berries from a U-pick farm become concentrated flavor bombs for oatmeal or baking.
Some fruits need pre-treatment to prevent browning. Apples, pears, and peaches benefit from a quick dip in lemon water before drying. Just mix lemon juice with water and soak the slices for five minutes. It doesn’t affect the taste much but keeps them from turning an unappetizing brown.
Blanching vegetables before dehydrating helps maintain color and texture. Boil them briefly, then plunge them into ice water to stop the cooking. Drain well before arranging on the trays. It’s an extra step but makes a noticeable difference in the final product.
Troubleshooting
Uneven drying usually means either the pieces aren’t uniform or your dehydrator has hot spots. Rotate the trays every few hours if you have a stackable model. With box-style dehydrators, the condition is less of an issue but still worth checking occasionally.
Over-drying makes food brittle and reduces flavor. Check doneness before the estimated time ends. Fruit should be pliable, like leather, not crispy. Vegetables should be completely dry and crispy. Jerky should bend without breaking but not feel moist.
If food isn’t drying at all, the temperature might be too low or the dehydrator might not be working properly. Make sure nothing’s blocking the vents and that air can circulate freely around each piece.
Storage
Proper storage is crucial. Dehydrated food can last months or even years if kept dry and sealed. Moisture is the enemy; even a little bit can cause mold or spoilage. Use airtight containers and store them somewhere cool and dark.
Mason jars work well for things you’ll use within a few months. For longer storage, vacuum-sealed bags are better. Some people add oxygen absorbers to jars for extra protection, especially for things like jerky that still contain some fat.
Label everything with the contents and date. Dried foods can look similar, and you don’t want to confuse your apple chips with your pear chips six months later. Check stored food occasionally for any signs of moisture or mold.

Rehydrating
Most dehydrated food rehydrates easily. For fruit, soaking in warm water for ten to fifteen minutes usually works. The water takes on the fruit flavor, so use it in smoothies or baking instead of dumping it out.
Vegetables can go straight into soups and stews while cooking. They’ll rehydrate as the liquid simmers. For faster results, pour boiling water over them and let them sit for a few minutes before adding to whatever you’re making.
Dehydrated meals need hot water and time. Pour boiling water into the bag or container, seal it, and wait. Stir occasionally and check if it needs more water. Some trial and error is involved in getting the water ratio right, but you’ll figure it out after a few tries.
Creative Uses
Dehydrated foods aren’t just for snacking. Grind dried vegetables into powder and use them to flavor soups, sauces, or even pasta dough. Tomato powder adds concentrated flavor without extra liquid. Mushroom powder makes an umami-rich seasoning.
Add dehydrated berries or apples to baked goods for bursts of concentrated flavor. They work better than fresh fruit in some recipes because they don’t add extra moisture that can mess up the texture.
Make your own tea blends with dried herbs, flowers, and fruit. Dried lemon slices, mint, and chamomile make a lovely combination. Experiment with different flavors until you find something you like.
Gifting Ideas
Homemade dehydrated foods make thoughtful gifts that don’t feel cheap or lazy. Layer different colored dried fruits in a mason jar for something visually appealing. Add a ribbon and a label with suggestions for how to use them.
Package jerky in small bags with custom labels. Include the flavor and any allergen information. Pair it with a craft beer or fancy crackers for a complete gift basket.
Make unique spice blends using your garden’s dried herbs. Mix Italian seasoning, taco seasoning, or curry blends. Include a recipe card showing how to use it. People appreciate getting something homemade that’s actually useful.
Maintenance
Clean your dehydrator after each use. Wash the trays with warm soapy water and let them dry completely before storing. Wipe down the base and fan area with a damp cloth. Don’t submerge the base or accumulate water in the electrical components, obviously.
Check for cracked trays or damaged screens periodically. Replace them if needed. Most manufacturers sell replacement parts. A well-maintained dehydrator can last for years of regular use.
Store it somewhere dry when not in use. Moisture can cause mold or rust in the fan housing. If you use it frequently, just leave it on the counter. If it’s seasonal, pack it away properly until you need it again.
Common Questions
How long does dehydrated food last?
It depends on the food and storage method. Properly dried and sealed fruit can last a year or more. Vegetables and herbs last even longer. Jerky lasts several months because it still contains some fat that can eventually go rancid. Vacuum sealing extends shelf life significantly compared to regular containers.
Can you dehydrate frozen food?
Yes, frozen fruit works wonderfully and is sometimes cheaper than fresh, especially out of season. Thaw it first and drain excess liquid before dehydrating. Frozen vegetables can also be dehydrated, though blanched fresh vegetables usually have better texture.
Is dehydrating food healthy?
Dehydrated food retains most nutrients, especially compared to canning. Vitamin C degrades some with heat, but overall it’s a beneficial preservation method. The main thing is you control what goes into it—no added preservatives or sugars unless you add them yourself. For healthier cooking options, check out these best chicken recipes that pair well with dehydrated vegetables.
What can’t you dehydrate?
High-fat foods like avocados don’t dehydrate well because fat doesn’t evaporate like water does. Dairy products are tricky, though low-fat options work better than full-fat. Eggs can be dehydrated but require specific techniques. Most fruits, vegetables, and lean meats work fine.
Final Thoughts
Food dehydrators are one of those tools that seem specialized until you actually use one. Then you realize how practical they are for regular cooking, not just prepping for the apocalypse or ultralight backpacking.
Start with simple recipes like fruit leather or vegetable chips. Get comfortable with how your specific dehydrator works and what drying times produce the results you want. Then experiment with more complex things like complete meals or custom spice blends.
The learning curve isn’t steep. You’ll make some mistakes, maybe over-dry some apples or under-season your first batch of jerky, but none of it is catastrophic. Dehydrating is forgiving enough that even mediocre results are usually still edible and better than most store-bought equivalents.
Most importantly, it’s a practical way to reduce food waste and save money while making healthier snacks. Whether you’re preserving a garden harvest, prepping camping meals, or just want cheaper alternatives to expensive dried fruit, a dehydrator earns its place in the kitchen pretty quickly once you start using it regularly.