Energy-Boosting Granola Bars: The Complete Homemade Guide
Why I Started Making My Own Granola Bars
I used to be that person grabbing protein bars at the checkout counter, convinced I was making a healthy choice. Then I actually read the ingredients list on one of those bars and nearly choked. The third ingredient was corn syrup. The fifth was “natural flavors” (which means basically nothing). There were more chemicals than recognizable foods. I was paying $3 for what amounted to candy marketed as health food.
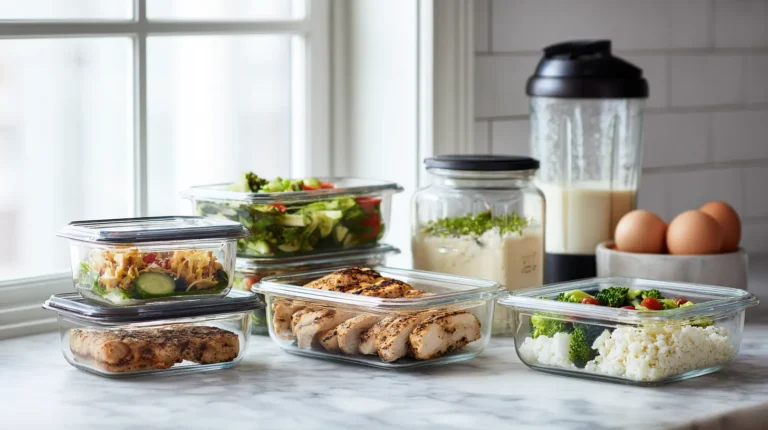
So I started making my own granola bars, and honestly? Game changer. They’re cheaper, taste better, and I actually know what’s in them. Plus, I can customize them however I want—more protein, less sugar, and different flavors every week. Now I always have a batch in my fridge, and I haven’t bought a store-bought bar in over a year. For more homemade snack ideas, check out our Healthy Recipes Guide.
What Makes Energy-Boosting Granola Bars Effective
It Gives You Sustained Energy
A good granola bar doesn’t give you a sugar rush followed by a crash an hour later. It provides steady energy through a combination of complex carbs, protein, and healthy fats. The carbs give you immediate fuel, the protein keeps you full, and the fats slow down digestion so the energy lasts.
This is why granola bars beat things like candy or even most protein bars—they’re designed for sustained energy, not just a quick hit. Think marathon, not sprint.
It Has Real Ingredients
The best granola bars use ingredients you’d actually find in your kitchen. These ingredients include oats, nuts, seeds, dried fruit, honey, and nut butter. That’s it. No weird preservatives, no artificial flavors, and no ingredients that require a chemistry degree to understand.
When I’m looking at a store-bought bar, if I can’t pronounce half the ingredients or the list goes on for ten lines, I skip it. Simple is better.
It Has the Right Balance
A granola bar should have a good mix of:
- Carbs for energy (usually from oats)
- Protein to keep you full (from nuts, seeds, or protein powder)
- Healthy fats for satisfaction (from nut butter or coconut oil)
- Fiber for digestion (from oats and seeds like chia or flax)
If it’s all carbs and sugar with minimal protein, it’s basically just a cookie. Which is fine if you want a cookie, but don’t pretend it’s health food.
The Problem with Most Store-Bought Bars
Way Too Much Hidden Sugar
This is the biggest issue. Many “healthy” granola bars have as much sugar as a candy bar—sometimes more. They’ll use fancy names like “organic cane juice” or “brown rice syrup,” but it’s all just sugar. Your body doesn’t care if the sugar is organic; it still spikes your blood glucose the same way.
Look at the label. If sugar (in any form) is one of the first three ingredients, that bar is basically candy. Aim for bars with 8 grams of sugar or less.
Not Enough Protein or Fiber
A lot of granola bars are heavy on carbs and light on everything else. Without adequate protein and fiber, they won’t keep you full. You’ll eat the bar, feel satisfied for maybe 30 minutes, then be hungry again.
I aim for at least 5 grams of protein and 3 grams of fiber per bar. More is better.
Weird Additives
Preservatives, artificial flavors, vegetable oils, soy lecithin—there’s all kinds of stuff in commercial bars that doesn’t need to be there. These additives extend shelf life and improve texture, but they don’t do anything good for your body.
How to Make Energy-Boosting Granola Bars at Home
Making granola bars at home is way easier than you’d think. Essentially, you combine the ingredients, press the mixture into a pan, refrigerate it, and then cut it into pieces. That’s it.
The Basic Formula
Here’s the template I use:
- 2 cups dry ingredients (oats, puffed rice, quinoa, etc.)
- 1/2 cup sticky stuff (honey, maple syrup, or dates blended with water)
- 1/2 cup nut butter (almond, peanut, cashew—whatever you like)
- 1/2 cup add-ins (nuts, seeds, dried fruit, chocolate chips)
- Pinch of salt (always)
Mix it all together, press firmly into a lined 8×8 pan, refrigerate for at least 2 hours, cut into bars. Done.
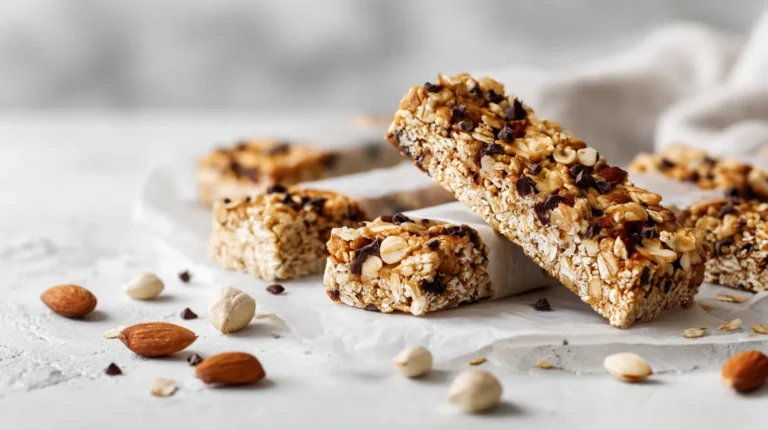
My Go-To Recipe: Energy-Boosting Granola Bars
This is what I make most often:
- 2 cups rolled oats
- 1/2 cup almond butter
- 1/3 cup honey
- 1/4 cup ground flaxseed
- 1/4 cup dark chocolate chips
- 2 tablespoons chia seeds
- 1 teaspoon vanilla extract
- Pinch of sea salt
Mix everything in a bowl until combined. Press firmly into a parchment-lined pan. Refrigerate for 2-3 hours. Cut into 12 bars. They keep in the fridge for about a week, or freeze them for up to 3 months.
How to Customize Them
This is where it gets fun. You can swap ingredients based on what you have or what you’re trying to achieve:
For more protein:
- Add a scoop of protein powder
- Use more nuts and seeds
- Add hemp hearts
For less sugar:
- Use less honey and more nut butter
- Replace dried fruit with nuts
- Skip the chocolate chips or use sugar-free ones
For different flavors:
- Peanut butter + chocolate chips = classic combo
- Almond butter and dried cranberries = fruity
- Cashew butter + coconut + dates = tropical
- Add cinnamon, vanilla, or cocoa powder for variety
For more healthy snack ideas, check out our Vegan Breakfast Recipes.
Common Problems and How to Fix Them
Bars Fall Apart
This happens when there’s not enough sticky stuff to bind everything. Solutions:
- Add more honey or nut butter
- Press the mixture REALLY hard into the pan
- Chill them longer before cutting
- Use a sharp knife and clean it between cuts
Too Sweet
Cut back on honey and increase the nut butter. You can also add more oats or unsweetened ingredients like coconut flakes or extra nuts.
Too Dry or Crumbly
Add more wet ingredients—nut butter, honey, or even a tablespoon of coconut oil. The mixture should be sticky enough to hold together when you squeeze a handful.
Taste Bland
Add salt. Seriously, salt makes everything taste better. Also try adding vanilla extract, cinnamon, or cocoa powder for more flavor depth.
When to Eat Granola Bars
Pre-workout: About 30-60 minutes before exercise. The carbs give you energy without making you feel heavy.
Post-workout: Within an hour after exercise. The protein helps with muscle recovery.
Mid-morning or afternoon snack: When you need something to tide you over between meals.
Travel or hiking: They’re portable, don’t need refrigeration, and provide solid energy for outdoor activities.
Emergency breakfast: Better than skipping breakfast entirely, though a full meal is ideal.
How to Store Them
Fridge: Homemade bars last about 7-10 days in an airtight container in the fridge. They stay firmer when cold.
Freezer: Wrap individually in parchment paper, then store in a freezer bag. They’ll keep for 3 months. Thaw for 10 minutes before eating, or eat them frozen (they’re actually good that way).
Room temperature: If your bars are really sticky or have chocolate chips, they might get too soft at room temp. But they’ll be fine for a few hours in a lunch bag or backpack.
Common Questions
Are granola bars good for weight loss?
They can be, but you have to choose wisely. Look for bars high in protein and fiber with minimal added sugar. And watch portion sizes—even healthy bars can be calorie-dense. They work best as a snack to prevent overeating later, not as a meal replacement.
Can kids eat these?
Absolutely. Just watch out for choking hazards with young kids—avoid large chunks of nuts. And check for any allergies. Otherwise, homemade granola bars are way healthier than most packaged snacks marketed to kids.
How many should you eat per day?
One or two, max. They’re snacks, not meals. Eating three granola bars a day means you’re probably not eating enough actual food.
Can they replace a meal?
In a pinch, yes. But they’re not nutritionally complete enough to regularly replace meals. Use them as emergency backup when you can’t get real food, not as your primary nutrition strategy.
Bottom Line
Granola bars are one of the easiest things you can make at home, and the homemade version is so much better than store-bought. You control the ingredients, the sweetness, the texture—everything. Plus, they’re cheaper and you can make exactly the flavors you want.
Start with the basic recipe I gave you, then experiment from there. Once you get the hang of it, you can whip up a batch in 10 minutes and have snacks for the whole week. Your wallet and your body will thank you. For more healthy homemade recipes, explore our complete Breakfast Recipes collection.
Related Recipes
Energy-Boosting Granola Bars
These no-bake energy-boosting granola bars combine rolled oats, almond butter, honey, flaxseed, chia seeds, and dark chocolate chips into a chewy snack with real, pronounceable ingredients. Ten minutes of mixing, a couple of hours in the fridge, and you have a week of snacks that beat any store-bought bar on price, taste, and sugar content.
Ingredients
- 2 cups rolled oats
- 1/2 cup almond butter
- 1/3 cup honey
- 1/4 cup ground flaxseed
- 1/4 cup dark chocolate chips
- 2 tablespoons chia seeds
- 1 teaspoon vanilla extract
- 1 pinch sea salt (always)
Instructions
- Mix everything in a large bowl until fully combined — the mixture should be sticky enough to hold together when you squeeze a handful. Too dry? Add more nut butter or honey.
- Press the mixture firmly into a parchment-lined 8x8 pan — pressing really hard is what keeps the bars from falling apart.
- Refrigerate 2-3 hours until firm.
- Cut into 12 bars with a sharp knife, wiping the blade between cuts.
Notes
Press hard and chill fully — that's what keeps the bars together; if they still crumble, add more honey or nut butter. Use alcohol-free vanilla extract. Keep 7-10 days in an airtight container in the fridge, or freeze individually wrapped up to 3 months (they're good eaten frozen too). Customize freely: a scoop of protein powder or hemp hearts for protein, swap honey down and nut butter up for less sugar, or go peanut butter + chocolate chips for the classic combo. Always add the pinch of salt.