Straight answer? Yes. Arm roast is tough. Really tough, actually—at least when it’s raw. But here’s what everyone forgets to mention: it doesn’t stay tough if you cook it right. And “right” isn’t complicated. It just requires patience, which I know isn’t what you want to hear when you’re standing at the grocery store wondering if this cheaper cut is worth buying.
We’re Nora and Nicolas, and we’ve been cooking arm roast for years—mostly because it’s what we could afford when our kids were growing up and grocery budgets were tight. The first time I made it, I treated it like a steak. Big mistake. We spent dinner night sawing through leather and pretending it was fine. It wasn’t fine. But once we figured out what this cut actually needs, it became one of our go-to meals.
So is arm roast tough? Yes, but only if you rush it or cook it wrong. Give it time and the right method, and it transforms into something incredibly tender—the kind of tender where the meat falls apart when you poke it with a fork. That’s what we’re breaking down in this guide: why it’s tough, what makes it tender, and exactly how to cook it so you don’t end up with the disaster we had that first time.
Why Is Arm Roast Tough in the First Place?
Arm roast comes from the shoulder area of the cow—specifically the front leg. This is a muscle that gets used constantly. Every time the cow moves, this muscle is working. And working muscles develop a lot of connective tissue (mostly collagen) to handle all that movement. More connective tissue equals tougher meat when it’s raw.
Compare that to something like ribeye, which comes from an area that doesn’t do much work. Less work means less connective tissue, which is why ribeye is naturally tender even with quick cooking. Arm roast is basically the opposite. It’s built for endurance, not tenderness—at least not without help.
The Collagen Factor
Here’s where it gets interesting though. All that collagen that makes arm roast tough? It can also make it incredibly tender if you cook it long enough at the right temperature. Collagen breaks down into gelatin when it’s heated slowly over time. That gelatin is what gives slow-cooked meats that rich, almost silky texture. It’s why pot roast and braised dishes are so satisfying—you’re literally transforming the tough stuff into the good stuff.
But you can’t rush this process. Cook arm roast hot and fast like you would a steak, and the collagen doesn’t have time to break down. It just stays tough and chewy. That’s what I did wrong the first time. Threw it in a 400°F oven, figured an hour would be enough. It wasn’t even close.
So Can You Actually Make Arm Roast Tender?
Absolutely. It just takes the right approach. The key is cooking it low and slow with moisture. That combination gives the collagen time to break down completely. We’re talking hours, not minutes. But the payoff is worth it—you end up with meat that’s so tender it practically melts.
Best Methods for Tender Arm Roast
There are a few cooking methods that work really well for turning tough arm roast into something tender and delicious.
Braising is probably the most reliable method. You sear the roast first to develop flavor, then cook it covered in liquid (beef broth works great) at a low temperature for 3-4 hours. The combination of moisture and low heat does exactly what the collagen needs to break down. We make braised arm roast at least once a month, usually in a Dutch oven in the oven set to 325°F. Check out this arm roast recipe for the full step-by-step process.
Slow cooker is another winner, especially if you’re not going to be home all day. Same principle as braising—low heat, plenty of liquid, lots of time. Set it in the morning before work, come home 8 hours later to a house that smells incredible and dinner that’s already done. The slow cooker is super forgiving too. If you leave it an extra hour because traffic was bad, the roast will still be fine. Probably even better.
Pressure cooker (like an Instant Pot) can achieve similar results in way less time. The high pressure forces moisture into the meat and speeds up the collagen breakdown. You can get fall-apart tender arm roast in about 70-80 minutes instead of 4 hours. It’s not quite the same as traditional slow cooking, but when you’re short on time, it’s a lifesaver. For more pressure cooking ideas, these Instant Pot recipes show different techniques.
Temperature and Timing Matter
The magic temperature range for breaking down collagen is between 160°F and 200°F. Below that, the collagen stays intact. Above that, you risk drying out the meat before the collagen has a chance to fully transform. Most slow cooking methods keep you in that sweet spot naturally—325°F in the oven, low setting on a slow cooker, high pressure in an Instant Pot.
As for timing, plan on at least 3 hours for oven braising, 8-10 hours for slow cooker on low (4-5 on high), or about 70 minutes under pressure. The roast is done when you can stick a fork in and the meat pulls apart easily. If you’re meeting resistance, it needs more time.

Mistakes That Make It Even Tougher
I’ve made basically every mistake you can make with arm roast. Learn from my failures.
Cooking It Too Fast
This is the biggest one. High heat and arm roast do not get along. I don’t care how much of a hurry you’re in—if you try to cook this cut at 400°F for an hour, you’re going to have a bad time. The outside will dry out before the inside has a chance to become tender. Keep the temperature low and give it time.
Not Enough Liquid
Arm roast needs moisture to stay tender during long cooking. If there’s not enough liquid in your pot or slow cooker, the meat will dry out even with low heat. Use at least 1-2 cups of beef broth, chicken broth, or vegetable broth. The liquid creates steam that keeps everything moist and also becomes the base for your gravy at the end.
Skipping the Sear
Okay, this won’t make the roast tougher, but it will make it less flavorful. Searing the outside in a hot pan before slow cooking creates those caramelized brown bits that add so much depth. It’s an extra 10 minutes of work, but the difference in flavor is noticeable. Those browned bits also dissolve into your cooking liquid and make the gravy way better.
Cutting Into It Too Soon
Once the roast is done, let it rest for at least 10-15 minutes before slicing. I know it smells amazing and you want to eat it immediately, but if you cut into it right away, all those juices you worked so hard to develop will run out onto your cutting board instead of staying in the meat. A little patience at the end makes a big difference.
What About Quick Cooking Methods?
Can you grill arm roast? Technically yes, but it’s not ideal. If you slice it into thin steaks (sometimes called ranch steaks), marinate them really well, and cook them fast over high heat to medium-rare, they can be decent. But you have to be careful—overcook them even slightly and they’ll be tough and chewy.
We’ve done this a few times when ribeyes were too expensive and we wanted something steak-like for the grill. It worked okay, but it’s not the same. Arm roast is just not built for quick cooking. It wants time and low heat. If you’re looking for a cut that grills well, go with sirloin or flank steak instead.
How Arm Roast Compares to Other Tough Cuts
Arm roast isn’t the only tough cut out there. Chuck roast, brisket, and round roast are all similar in that they need slow cooking to become tender. But there are differences.
Arm Roast vs. Chuck Roast
Chuck roast has more fat marbling, which makes it a bit more forgiving during cooking and gives it a richer, juicier texture. Arm roast is leaner, which means it’s a healthier option but requires a little more attention to make sure it doesn’t dry out. Both are great for pot roast and braising—chuck will be juicier, arm roast will have a stronger beef flavor.
Arm Roast vs. Brisket
Brisket is even tougher than arm roast when raw, which is why it’s almost always smoked or braised for many hours. It has more fat though, which keeps it moist during really long cooking times. Arm roast cooks a bit faster and is leaner, making it a better choice if you want something hearty but not as heavy.

Our Go-To Method for Tender Arm Roast
After years of trial and error, here’s what works best for us. We braise it in the oven because we can control the temperature better than on the stovetop, and it’s more hands-off than babysitting a pot on the stove.
Start by patting the roast dry and seasoning it generously with salt, pepper, and garlic powder. Heat up some oil in a Dutch oven or heavy pot until it’s almost smoking, then sear the roast on all sides until it’s deeply browned—about 3-4 minutes per side. Don’t rush this part. Those browned bits are flavor.
Once it’s seared, take the roast out and set it aside. Add chopped onions, carrots, and celery to the pot (use the rendered fat from the roast) and cook them for a few minutes until they start to soften. Pour in about 2 cups of beef broth and scrape up all those brown bits from the bottom of the pot.
Put the roast back in, add a few sprigs of fresh thyme and rosemary (or dried if that’s what you have), cover the pot tightly, and stick it in a 325°F oven for 3-4 hours. Check it after 3 hours—if the meat pulls apart easily with a fork, it’s done. If not, give it another 30 minutes and check again.
Let it rest for 15 minutes before slicing. Use the cooking liquid as gravy—it’ll be packed with flavor from all those vegetables and herbs. Serve it with mashed potatoes or crusty bread to soak up every drop. This method has never failed us.
When Arm Roast Is Worth It (And When It’s Not)
Arm roast is worth buying if you’re okay with planning ahead. It’s not a last-minute dinner option. If you get home at 6 PM and need to eat by 6:30, this isn’t your cut. But if you can start it in the morning or have a few hours on a weekend afternoon, it’s one of the best values in the meat section.
It’s also worth it if you’re feeding a crowd on a budget. One 4-pound arm roast costs a fraction of what you’d pay for equivalent servings of ribeye or sirloin, and when cooked properly, it’s just as satisfying. We’ve served it to guests plenty of times and always get compliments. Nobody’s ever complained that it was tough.
Where it’s not worth it: if you only have an hour and want steak. Just buy actual steak. Don’t try to make arm roast work in situations where it’s not built to succeed. Use the right tool for the job.
What to Do With Leftover Arm Roast
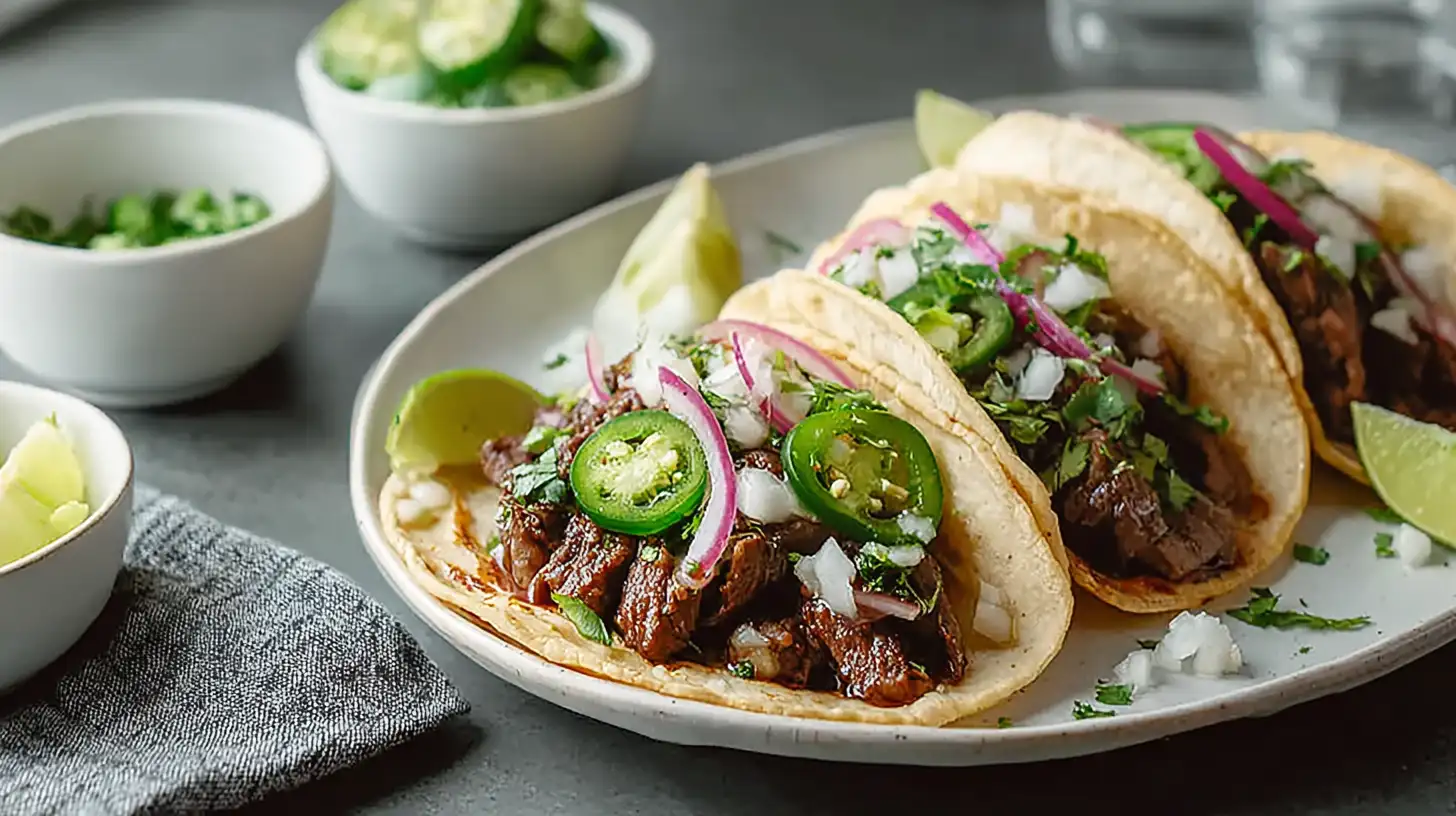
If you have leftovers (which you probably will because arm roast is a big cut), there are so many ways to use them. Shred the meat and use it for tacos—season it with cumin, chili powder, and lime juice. Make sandwiches with the sliced meat and some horseradish or mustard. Toss chunks of it into soup or stew. Mix it with pasta and vegetables for a quick weeknight dinner.
The meat actually tastes better the next day once all the flavors have had time to soak in. We usually cook a roast with the specific intention of having leftovers for the week. It makes meal planning so much easier when you’ve already got cooked protein ready to go. For more leftover inspiration, check out these steak pasta recipes that work just as well with leftover roast.

Final Thoughts on Tough Arm Roast
So is arm roast tough? Yes, but that’s not the whole story. It starts tough, but it doesn’t have to end that way. With the right cooking method—low heat, plenty of moisture, and enough time for the collagen to break down—it becomes incredibly tender. The kind of tender where the meat falls apart when you look at it wrong.
It’s not a cut for people in a hurry. It’s not glamorous or Instagram-worthy when it’s raw. But if you’re willing to invest a few hours (most of which is hands-off), you end up with a meal that’s satisfying, flavorful, and way cheaper than most alternatives. That’s why we keep coming back to it.
Next time you see arm roast on sale, grab one. Give it a shot. Follow the slow cooking guidelines, don’t rush it, and see what happens. I think you’ll be surprised at how something that starts out so tough can turn into something so tender. We were.
Common Questions About Tough Arm Roast
Why did my arm roast turn out dry and tough?
Usually because the temperature was too high or there wasn’t enough liquid. Arm roast needs to cook at 325°F or lower with at least 1-2 cups of broth to stay moist. If you cooked it at 350°F or higher, that’s too hot. The outside dries out before the inside can become tender.
How long does it take to make arm roast tender?
At least 3 hours in the oven at 325°F, 8-10 hours on low in a slow cooker, or about 70-80 minutes in a pressure cooker. The meat is done when a fork slides in easily and the meat pulls apart without resistance. If you’re still meeting resistance, it needs more time.
Can you cook arm roast like a steak?
Not really. If you slice it thin into ranch steaks, marinate them well, and cook them quickly to medium-rare, they can work. But they’ll never be as naturally tender as actual steak cuts. Arm roast is built for slow cooking, not quick grilling.
Is arm roast tougher than chuck roast?
They’re similar in toughness when raw, but chuck roast has more fat marbling which makes it slightly more forgiving during cooking. Arm roast is leaner, so you need to be a bit more careful about moisture and temperature. Both become tender with proper slow cooking though.
What’s the best way to cook tough arm roast?
Braising is the most reliable method. Sear it first, then cook it covered in broth at 325°F for 3-4 hours. Slow cooker works great too—8-10 hours on low with plenty of liquid. Both methods give the collagen time to break down completely, which is what transforms tough meat into tender meat.