What to Serve with Italian Sliders: Perfect Pairing Ideas
I made Italian sliders for a Super Bowl party once. Bought fancy Hawaiian rolls, piled on expensive salami and prosciutto, and added three types of cheese. Baked them exactly 15 minutes like the recipe said. They came out as a soggy, falling-apart mess. The bread dissolved into mush, fillings slid everywhere, and cheese leaked out the sides. Everyone just grabbed chips instead. That embarrassment taught me slider bread needs structure, not just softness, and timing matters more than following recipes blindly.
Italian sliders work when you understand the engineering—sturdy bread that won’t dissolve, proper layering so nothing slides out, and the right moisture balance so they’re juicy but not soggy. The Italian part comes from quality cured meats, real mozzarella that melts properly, and seasoning that tastes like actual Italian food instead of “Italian seasoning” from a jar. Get these basics right, and sliders become actually good instead of just convenient. For more Italian cooking, check out our Italian meatloaf guide.
Why Italian Sliders Are Different from Regular Sliders
What Makes a Slider Actually a Slider
A slider is not just a small sandwich. Real sliders have specific characteristics: size (2-3 bites maximum), soft but structured bread, fillings that stay put, and the ability to be eaten one-handed without mess. The name supposedly comes from how they slide down easily—though if yours are literally sliding apart, something’s wrong.
Original sliders were mini burgers at White Castle in the 1920s. Small size meant fast cooking, cheap pricing, and easy eating. The format caught on because it’s genuinely practical—easier to eat standing up, portion control built in, and fun for parties where people want to try multiple things.
The Italian Slider Difference
Italian sliders swap American burger ingredients for Italian subcomponents. Instead of a beef patty and American cheese, you get cured Italian meats and proper Italian cheese. Instead of ketchup and pickles, you get marinara or pesto and roasted peppers.
The key difference is the layering technique. Italian subs layer ingredients horizontally—meat, cheese, vegetables, and condiments in distinct layers. This same approach applies to Italian sliders but compressed into a smaller format. Each bite should have every component, not a random distribution of ingredients.
Why Italian Sliders Became Popular
Italian sliders got popular because they solve the “Italian sub is too big” problem. A full Italian sub is a commitment—12 inches of sandwich, heavy, messy, and takes time to eat. Sliders give you the same flavors in a manageable size.
They also work for parties better than full subs. Cut a big sub into pieces, and the edges dry out, and the fillings fall out. Make individual sliders, and each person gets a complete, intact sandwich. Plus, they look better on serving platters than sad sub chunks.
Essential Ingredients for Italian Sliders
Choosing Italian Slider Bread That Works
Bread makes or breaks sliders. I learned this the hard way with my Super Bowl disaster. Here’s what actually works:
Hawaiian rolls: Popular but risky. They’re soft and sweet, which sounds good until they turn to mush from moisture. Only use if you’re baking immediately and keeping sauce minimal. The sweetness also clashes with savory Italian meats—it works better for ham and cheese than salami.
Ciabatta rolls: Better choice. Firmer structure, can handle moisture, Italian origin so flavors match. The downside is they’re harder to find in slider size. Regular ciabatta cut into small squares works but looks less neat.
Potato rolls: a good middle ground. Soft but not too soft, neutral flavor, and holds up to moisture reasonably well. Martin’s potato rolls are my go-to—they’re what I use now after multiple failed batches with Hawaiian rolls.
Slider buns (generic): Avoid unless desperate. Too dry, tastes like cardboard, and falls apart weirdly. Grocery store bakery slider buns are usually terrible.
Italian Meats for Sliders
Use actual Italian cured meats, not “Italian-style” processed stuff. Quality matters here.
Salami (Genoa or hard salami): Backbone of Italian sliders. Slightly spicy, good fat content, intense flavor. Use thin-sliced—thick slices are chewy and hard to bite through in a small sandwich.
Pepperoni: Works but makes sliders taste like pizza. Not bad, just a different vibe. Use if you want familiar flavors or are feeding kids who don’t like “weird” salami.
Prosciutto: A fancy option. Delicate, salty, expensive. Tears easily, so it’s hard to layer neatly. Save money and use salami unless trying to impress someone.
Capicola (hot or sweet): My favorite, actually. More interesting than salami, not as fussy as prosciutto. Hot capicola adds a nice kick without being overwhelming.
Mortadella: Underrated. Smooth texture, mild flavor, and visible fat chunks (sounds gross, tastes good). Kids often like it better than salami.
Ratio: Use 2-3 thin slices total per slider. Mix two meats (salami + capicola is a classic combo) rather than one type. More variety = more interesting.

Cheese for Italian Sliders
Cheese is where people mess up most. Wrong cheese ruins everything.
Fresh mozzarella: Sounds right but WRONG for sliders. Too much moisture makes bread soggy, doesn’t melt nicely, and tears instead of slicing. Save it for caprese salad.
Low-moisture mozzarella: Correct choice. The blocks you shred yourself or buy pre-sliced. Melts smooth, doesn’t leak water, and stays put. This is what you want.
Provolone: Also good. Sharper flavor than mozzarella, melts well, traditional Italian deli choice. Use mild provolone unless everyone likes strong cheese flavor.
Parmesan: Not the main cheese but a good addition. Shred some on top before baking for extra flavor and crispy bits. The real stuff (Parmigiano-Reggiano), not the sawdust in the green can.
American cheese: Absolutely not. Wrong flavor profile, weird texture, defeats the entire purpose of Italian sliders. If someone suggests this, they’re wrong.
Vegetables and Extras
Roasted red peppers (from jar): Essential. Sweet, slightly tangy, and no crunch to compete with the meat texture. Drain them well—jar liquid makes everything soggy.
Banana peppers: If you want slight tang and heat. Mild enough that most people tolerate them.
Lettuce: Skip it. Wilts from heat, adds moisture, wrong texture. Lettuce belongs on cold subs, not baked sliders.
Tomatoes: Also skip fresh ones. Too much moisture makes bread soggy. Sun-dried tomatoes work better—concentrated flavor, no water content.
Onions: Thinly sliced raw red onion if you must. Most people find them too strong for sliders, though. Caramelized onions are better, but that’s extra work.
Olives: Controversial. I like them; many people don’t. Slice thin if using—whole olives roll around and make eating messy.
Sauces for Italian Sliders
Marinara: Classic but risky. Use a small amount, or the bread drowns. I spread it on top of the cheese layer, not directly on the bread—it creates a moisture barrier.
Pesto: A better choice in my opinion. More concentrated flavor, so you need less; doesn’t add much moisture; spreads easier than chunky marinara.
Italian dressing: Weird but works. The vinegar-oil kind you’d put on salad. Brush on top of assembled sliders before baking. Adds flavor without internal moisture problems.
Garlic butter: my secret weapon. Melt butter, add minced garlic and Italian herbs, and brush on top before baking. Makes tops golden and crispy, adds huge flavor with no sogginess risk.
Mayo/aioli: Some people swear by it. I find it makes things too rich and greasy. But if you like mayo-heavy subs, a thin layer on the bottom bun works.
How to Make Italian Sliders That Don’t Fall Apart
Italian Slider Assembly Process
Don’t make individual sliders—too much work, and they cook unevenly. Make them connected in the baking pan, then separate them after cooking.
Step-by-step assembly:
- Get a roll sheet (12 connected rolls) or arrange individual rolls tight in a 9×13 pan. Don’t separate them.
- Slice the entire sheet horizontally. One cut, sharp serrated knife, gentle sawing motion. Keep the top and bottom together—don’t separate yet.
- Remove the top half and set it aside.
- Layer bottom half: very thin spread of sauce (if using), cheese slices covering entire surface, meat slices overlapping slightly, peppers/vegetables, another layer of cheese.
- Replace the top half of the rolls.
- Press down gently but firmly. Rolls should compress slightly but not squish.
Critical details: Cheese goes directly on bread (top and bottom if possible) because melted cheese acts like glue holding everything together. Meat in the middle because it’s the sturdiest component. Vegetables between meat and cheese so they don’t make bread soggy.
Baking Italian Sliders Correctly
This is where my original batch went wrong. Here’s what actually works:
Temperature: 350°F, no higher. 375°F burns tops before middles heat through. 325°F takes too long and dries everything out.
Covering: Cover with foil for the first 10 minutes. This steams sliders slightly, helps cheese melt, and prevents tops from burning. Remove foil for the last 5-10 minutes to crisp tops.
Timing: 15-20 minutes total. Check at 15—if the cheese is fully melted and the tops are golden, they’re done. Don’t overbake, or the bread gets hard.
Toothpicks: Before baking, stick toothpicks through rolls every few inches. This keeps tops from sliding off during baking. Remove before serving (obviously).
Butter brush: Mix melted butter with garlic powder, Italian seasoning, and a little salt. Brush on top before baking. This is not optional—it’s what makes tops golden and delicious instead of pale and sad.
Cutting Italian Sliders
Let cool 5 minutes after baking. Cheese needs time to set slightly, or it all pulls out when you separate sliders.
Cut with a sharp serrated knife. Use a gentle sawing motion; don’t press down hard. If rolls were already perforated, follow those lines. Otherwise, cut straight lines, making squares.
Corner pieces are crispier (more exposed surface area). Middle pieces are softer and juicier. Keep this in mind when serving—give corner pieces to people who like crispy and middle pieces to people who like soft.

Italian Slider Variations That Actually Work
Vegetarian Italian Sliders
Remove meat; don’t just leave a gap. Replace with vegetables that have substance:
- Grilled eggplant slices: Meaty texture, absorbs flavors, substantial enough to carry sliders
- Portobello mushrooms: Similar to eggplant but with an earthier flavor
- Roasted zucchini: Lighter option, mild flavor lets cheese and sauce shine
Increase cheese slightly to compensate for missing meat richness. Use more flavorful cheese like sharp provolone instead of mild mozzarella.
Don’t use raw vegetables. They release moisture during baking, don’t soften enough to bite through easily, and add the wrong texture. Always cook vegetables first.
Spicy Italian Sliders
Add heat without killing flavor:
- Use hot capicola instead of regular (easiest method)
- Add sliced pepperoncini (drain well first)
- Mix red pepper flakes into butter before brushing tops
- Use spicy marinara or add Calabrian chili paste to regular marinara
Don’t use hot sauce directly on sliders—it adds moisture, and vinegar changes the flavor too much. If people want extra heat, serve hot sauce on the side.
Italian Meatball Sliders
Different approach since meatballs are round and thick. Slice small meatballs in half horizontally or use mini meatballs whole. Layer cheese below and above meatballs so everything sticks together. Increase marinara since meatballs need sauce. These are messier than regular Italian sliders but good if you have leftover meatballs. For meatball recipes, see our Italian meatloaf guide.
Common Italian Slider Problems Fixed
Soggy Italian Sliders
Causes: Too much sauce, too much vegetable moisture, bread too soft, not baked long enough
Fixes: Use less sauce or thicker sauce (tomato paste instead of marinara). Drain vegetables completely, and pat dry with a paper towel. Use sturdier bread. Bake until tops are actually crispy—don’t take them out when they look “done enough.”
Falling Apart Italian Sliders
Causes: Cut them hot, too much filling, didn’t use cheese as glue, separated rolls before baking
Fixes: Let rest 5 minutes after baking. Don’t overstuff—2-3 meat slices maximum. Put cheese layers touching bread. Keep rolls connected during baking.
Dry Italian Sliders
Causes: Overbaked, oven too hot, didn’t cover with foil, bread was stale
Fixes: Use foil cover for the first half of baking. Check at 15 minutes instead of waiting the full 20. Brush more butter on tops. Use fresh bread. Add a thin layer of mayo or oil-based spread on bread before assembly (creates a moisture barrier).
Bland Italian Sliders
Causes: Low-quality deli meat, not enough seasoning, wrong cheese, skipped butter topping
Fixes: Buy actual Italian meats from an Italian deli or a good grocery store deli counter, not pre-packaged stuff. Season each layer—sprinkle Italian herbs between layers. Use flavorful cheese (aged provolone, not mild mozzarella). Don’t skip garlic butter on top—it’s critical for flavor.
Serving and Storing Italian Sliders
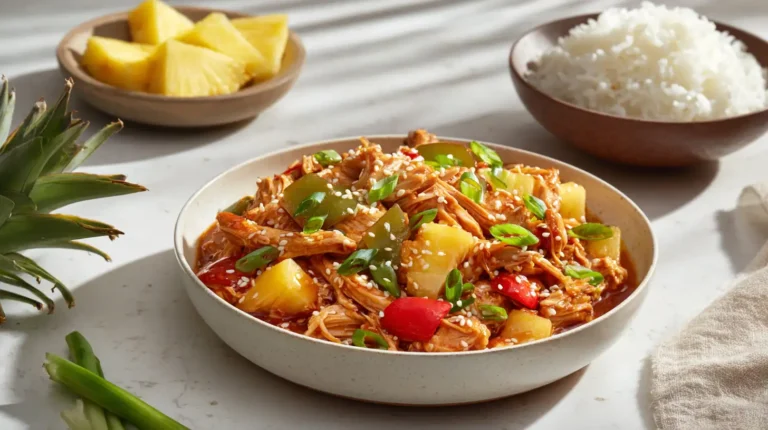
What to Serve with Italian Sliders
Sides that work:
- Simple green salad with Italian dressing (don’t overthink it)
- Potato chips (yes, really—they’re slider food, not fancy dinner)
- Pasta salad (keep it simple; don’t make whole separate meal)
- Pickles, olives, pepperoncini (classic Italian antipasto items)
Sides that don’t work: Heavy sides like mashed potatoes or rice. Sliders are already bread-heavy. Keep sides light or vegetable-based.
For side inspiration, check out our chicken and potato recipes.
Storing Italian Sliders
Refrigerator: Wrap tightly in foil; store up to 3 days. They actually taste pretty good cold—the flavors meld together. Some people prefer them cold (like the cold pizza phenomenon).
Freezer: Wrap individual sliders in plastic wrap, then put all in a freezer bag. Freeze for up to 2 months. Thaw in the fridge overnight before reheating.
Reheating: Oven at 325°F, wrapped in foil, 10-12 minutes if refrigerated, 15-20 if frozen. The microwave works but makes bread rubbery—only use if desperate. Air frying at 320°F for 5-7 minutes makes tops crispy again (my preferred method).
Make-Ahead Italian Sliders
Assemble completely; don’t bake. Wrap tightly in foil, and refrigerate up to 24 hours. When ready to serve, bake as normal, but add 5 minutes to the cooking time since starting cold.
This is a game-changer for parties. Do all prep work the day before; just pop it in the oven when guests arrive. The kitchen stays clean, you’re not stressed, and sliders come out hot and fresh.
Italian Sliders Questions Answered
What makes Italian sliders different from regular sliders?
Italian meats (salami, capicola, and prosciutto) instead of burgers or ham. Italian cheeses (mozzarella, provolone) instead of American cheese. Italian flavors (marinara, pesto, roasted peppers, and Italian herbs) instead of American condiments. The whole flavor profile is Mediterranean, not American.
Can you make Italian sliders ahead?
Yes. Assemble completely, wrap tight in foil, and refrigerate up to 24 hours. Bake when needed, adding 5 extra minutes since starting cold. Or bake, cool completely, refrigerate, then reheat. Both methods work—it depends if you prefer the convenience of baking later or reheating already-cooked sliders.
What’s the best bread for Italian sliders?
Potato rolls (like Martin’s brand) balance softness with structure. Hawaiian rolls work if you’re careful with moisture and bake immediately. Ciabatta rolls if you can find slider size. Avoid generic slider buns from grocery stores—they’re usually terrible.
What cheese melts best for Italian sliders?
Low-moisture mozzarella (the block kind you shred or buy pre-sliced). NOT fresh mozzarella—too much moisture makes sliders soggy. Provolone also melts well and adds more flavor. Mix both for best results—mozzarella for melt, provolone for taste.
Can you grill Italian sliders?
Yes, but tricky. Wrap assembled sliders tightly in heavy-duty foil. Put on grill over medium-low heat (not direct flame). Cook for 15-20 minutes, flipping the package halfway through. Cheese needs to melt, and everything needs to heat without burning. Easier in the oven, honestly, but grilled sliders do have a nice smoky flavor if done right.
Final Reality on Italian Sliders
Italian sliders work when you respect the engineering requirements—sturdy bread, proper layering, the right moisture balance, and adequate baking time. The Italian part is easy—just use quality Italian deli meats and cheese instead of American ingredients. The slider part is harder—it requires attention to structure and technique.
My Super Bowl disaster taught me you can’t just throw ingredients on soft bread and hope. Bread choice matters. Layer order matters. Cheese as glue matters. Baking technique with foil covering matters. Get these right, and sliders are genuinely good party food. Get them wrong and you have a soggy, falling-apart mess nobody wants to eat.
Start with the basic version: potato rolls, salami plus capicola, provolone cheese, roasted red peppers, and garlic butter on top. Bake at 350°F covered for 10 minutes, then uncovered for 5-10 minutes. This formula works reliably. Once you’ve mastered the basics, experiment with variations. For more Italian recipes, see our complete cooking collection.
For another crowd-pleasing Italian dinner, try our classic turkey meatballs and spaghetti — simple, hearty, and always a hit.