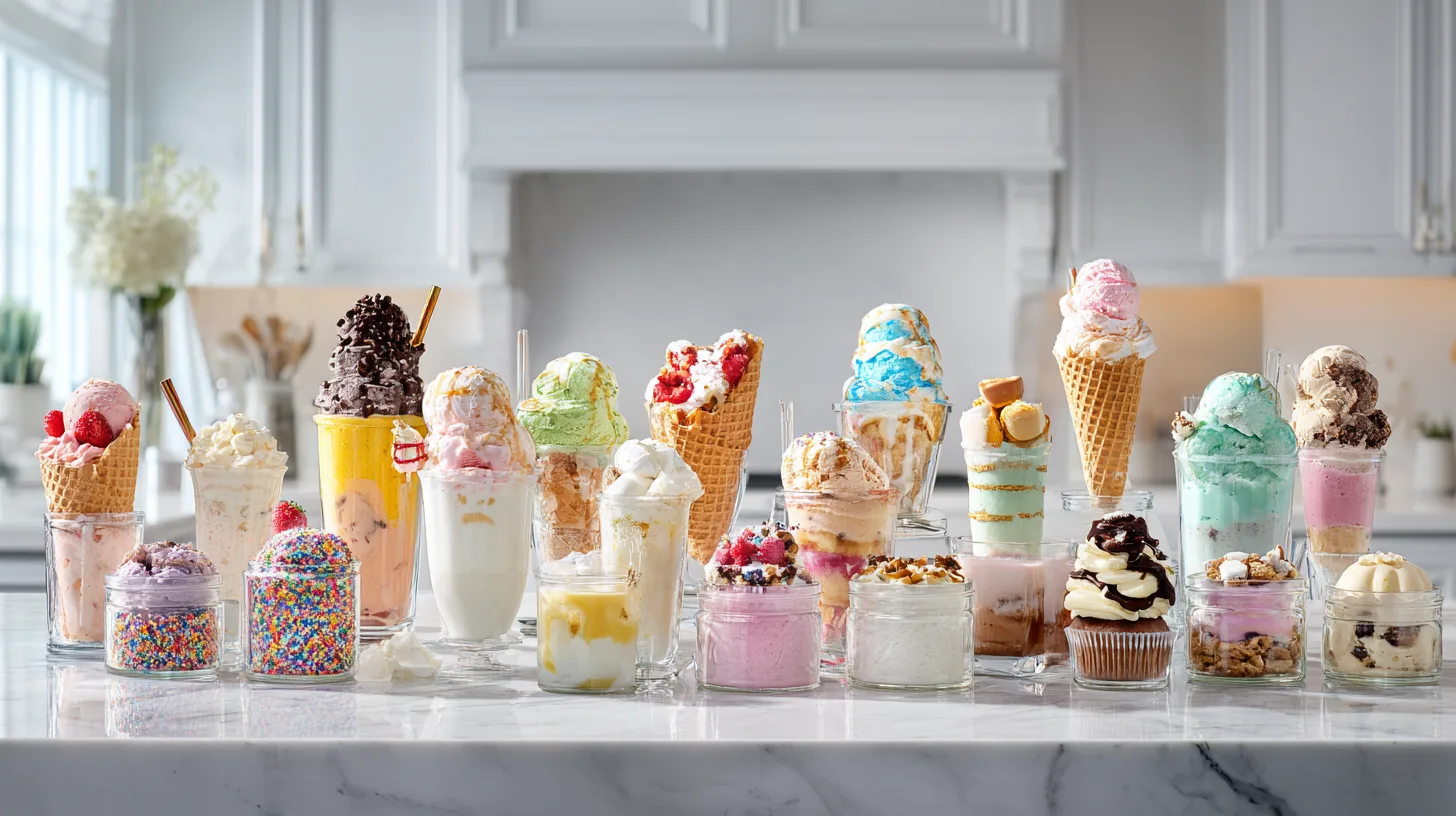
Best Ninja Creami Recipes—Your Guide to Amazing Homemade Frozen Treats
You know what? When Nicolas first dragged home our Ninja Creami last spring, I literally rolled my eyes so hard I thought they might get stuck that way. I mean, seriously—another kitchen gadget? Our cabinets were already bursting with his “revolutionary” finds that mostly just collected dust and made me feel guilty every time I opened the cupboard.
But here’s where I have to eat my words (and boy, are they delicious). This little machine has completely transformed how we think about dessert in our house, and I’m not just saying that because Nicolas reads these articles and smirks when I admit he was right about something.
These Ninja Creami recipes have become our family’s obsession. I’m talking about the kind of frozen treats that make you close your eyes and do that little happy dance when you taste them. Whether it’s Saturday afternoon and the kids are begging for something sweet, or we’re having friends over and I want to serve something that’ll make them think I’m way fancier than I actually am, this collection has never let me down.
From classic vanilla that tastes like childhood memories to completely wild flavor combinations that shouldn’t work but somehow do (looking at you, lavender honey that the girls went absolutely crazy for), we’ve tested every single one of these recipes until they were absolutely perfect. And trust me, there were some spectacular failures along the way—like that unfortunate avocado-chocolate experiment of 2023 that we still joke about at family dinners.
What Makes the Ninja Creami Perfect for These Amazing Recipes?
Let me tell you something about Ninja Creami recipes and why this machine is honestly genius in ways I never expected. It’s not one of those traditional ice cream makers where you’re fiddling with salt and ice for hours, wondering if anything magical is actually happening in there while you wait around like some kind of frozen dessert hostage.
This thing takes completely frozen solid bases—and I mean rock solid, like you could probably defend yourself with them—and transforms them into the creamiest, smoothest frozen treats you’ve ever had. It’s like watching magic happen, except the magic is science, and the result is ice cream that makes store-bought stuff taste like sad, sugary water.
Whether you’re completely new to making frozen desserts at home (like I was—my previous experience was limited to popsicles from the grocery store) or you’ve been experimenting for years, the Ninja Creami simplifies everything with preset programs that actually work. No guesswork, no crossing your fingers and hoping the dessert gods smile upon you, just consistent, amazing results that make you feel like a culinary wizard.
Classic Ninja Creami Recipes for Every Single Occasion
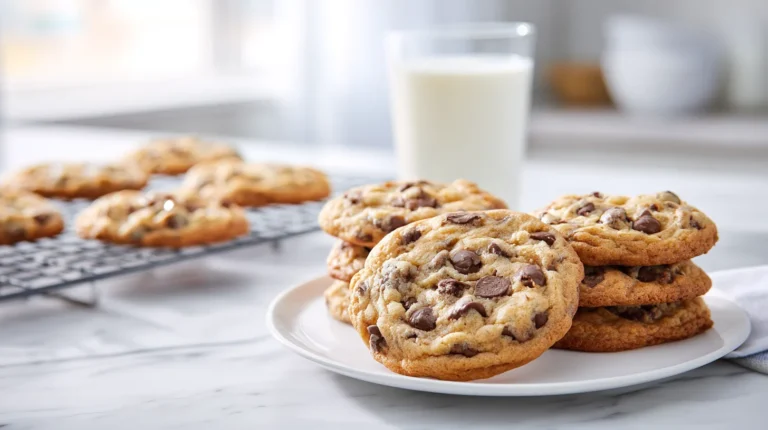
From vanilla ice cream that’s so good it’ll ruin you for the store-bought stuff forever to rich chocolate gelato that tastes like it was imported directly from a tiny Italian shop, these classic Ninja Creami recipes cover all the bases. And honestly? Start with something simple like our chocolate chip cookie recipe to pair with homemade ice cream—it’s the kind of dessert combo that makes people think you spent way more time than you actually did.
Healthy Ninja Creami Recipes for the Health-Conscious (That Don’t Taste Like Sadness)
Here’s where things get really exciting, and this is coming from someone who used to think “healthy dessert” was an oxymoron. The Ninja Creami lets you create these incredible alternatives like low-calorie froyo and vegan ice cream that actually taste indulgent instead of like you’re punishing yourself for wanting something sweet.
Balance these lighter treats with nutritious meals like our wholesome soup collection, and you’ve got yourself a perfectly balanced eating plan that doesn’t make you feel like you’re depriving yourself of life’s simple pleasures.
Features That Make These Ninja Creami Recipes Actually Work (Unlike My Previous Disasters)
Okay, so what makes this machine so special for Ninja Creami recipes? Let me break it down for you, because I wish someone had explained this to me before I spent years struggling with inferior methods:
- Compact Design That Doesn’t Take Over: It fits perfectly on our already-crowded countertop without making me rearrange everything or banish other appliances to storage purgatory
- Multiple Programs That Actually Work: Different settings for ice cream, sorbet, gelato, milkshakes—each one specifically designed for particular textures, not just random buttons
- Complete Ingredient Control: You decide what goes in, how sweet it is, exactly how you want it to taste, and what weird stuff to avoid (looking at you, artificial flavors)
- Dishwasher-Safe Everything: This honestly sold me on the whole thing because cleanup used to be the worst part of making frozen treats
With these features working together, making amazing frozen desserts becomes something you actually look forward to instead of dreading the mess and uncertainty that comes after.
Why I’m Completely Obsessed with These Homemade Ninja Creami Recipes
You know what’s funny? We originally started making our own frozen desserts because of my youngest daughter’s dairy allergies, but now I honestly can’t imagine going back to store-bought stuff. It’s like when you taste really good coffee and suddenly realize you’ve been drinking brown water for years—there’s just no going back to mediocrity.
When you control every single ingredient that goes into your dessert, you’re not just making something healthier (though that’s definitely a bonus). You’re creating treats that are infinitely more delicious, completely customizable to your family’s preferences, and way more satisfying than anything you can grab off a grocery store shelf.
The Real Health Benefits of Making Your Own Ninja Creami Recipes
When you make Ninja Creami recipes at home, you’re completely avoiding those artificial additives, preservatives, and frankly terrifying amounts of sugar that manufacturers seem to think are necessary. This is especially important if you’re dealing with dietary restrictions or food allergies like we are—reading ingredient labels on store-bought ice cream is like deciphering some kind of chemical code.
The Ninja Creami lets you incorporate fresh fruits, natural sweeteners that don’t make your teeth hurt, and alternative milk options that actually taste good. You’re essentially getting dessert and nutrition in the same package, which feels like cheating the system but in the most delicious way possible.
Plus, and this is something I never expected, the kids are actually learning about ingredients and cooking by helping with these recipes. My middle daughter can now explain the difference between natural and artificial vanilla to anyone who’ll listen—it’s become her party trick.
The Versatility That’ll Completely Change Your Dessert Game
Here’s what absolutely blew my mind about Ninja Creami recipes—this machine isn’t just for ice cream. It’s like having an entire frozen dessert shop in your kitchen. Beyond the obvious ice creams and sorbets, we’ve successfully made:
- Smoothie Bowls That Don’t Melt: Perfect for those mornings when regular breakfast feels too ordinary, or when the kids want something that feels like a treat but is actually packed with good stuff
- Frozen Yogurt That Rivals Expensive Shops: Lighter option for when you want something sweet but not so heavy that you need a nap afterward
- Custom Mix-Ins That Make Everyone Happy: Nuts for Nicolas, chocolate chips for me, fruit chunks for the kids—everyone gets exactly what they want
It’s honestly become our gateway to endless dessert creativity. Every week, someone in the family suggests a new flavor combination, and more often than not, we end up with something amazing that we never would have thought to try before.
Getting Started with Your First Ninja Creami Recipes (Without the Beginner Mistakes I Made)
Understanding the Components for Perfect Ninja Creami Recipes
Before you dive headfirst into making these amazing frozen treats, let me save you from the confusion I experienced on my first attempt. The machine looks more complicated than it actually is, but understanding what you’re working with makes everything so much smoother:
- Outer Bowl: This is what holds everything in place while the machine works its magic—think of it as the steady foundation for all the excitement that’s about to happen
- Pint Container: Where your ingredients will freeze overnight and then get transformed into creamy perfection—this is where all the anticipation builds
- Lid with Paddle: The spinning action that creates that smooth, dreamy texture we’re all after—it’s surprisingly satisfying to watch
- Control Panel: Your command center with helpful preset programs that take the guesswork out of everything
- Base Unit: The powerhouse that makes it all happen—surprisingly quiet for how much work it’s doing
Once you understand these basics, operating the machine becomes as natural as making coffee in the morning. Trust me, even I figured it out, and I’m the person who once tried to microwave something in a toaster oven and wondered why it wasn’t working.
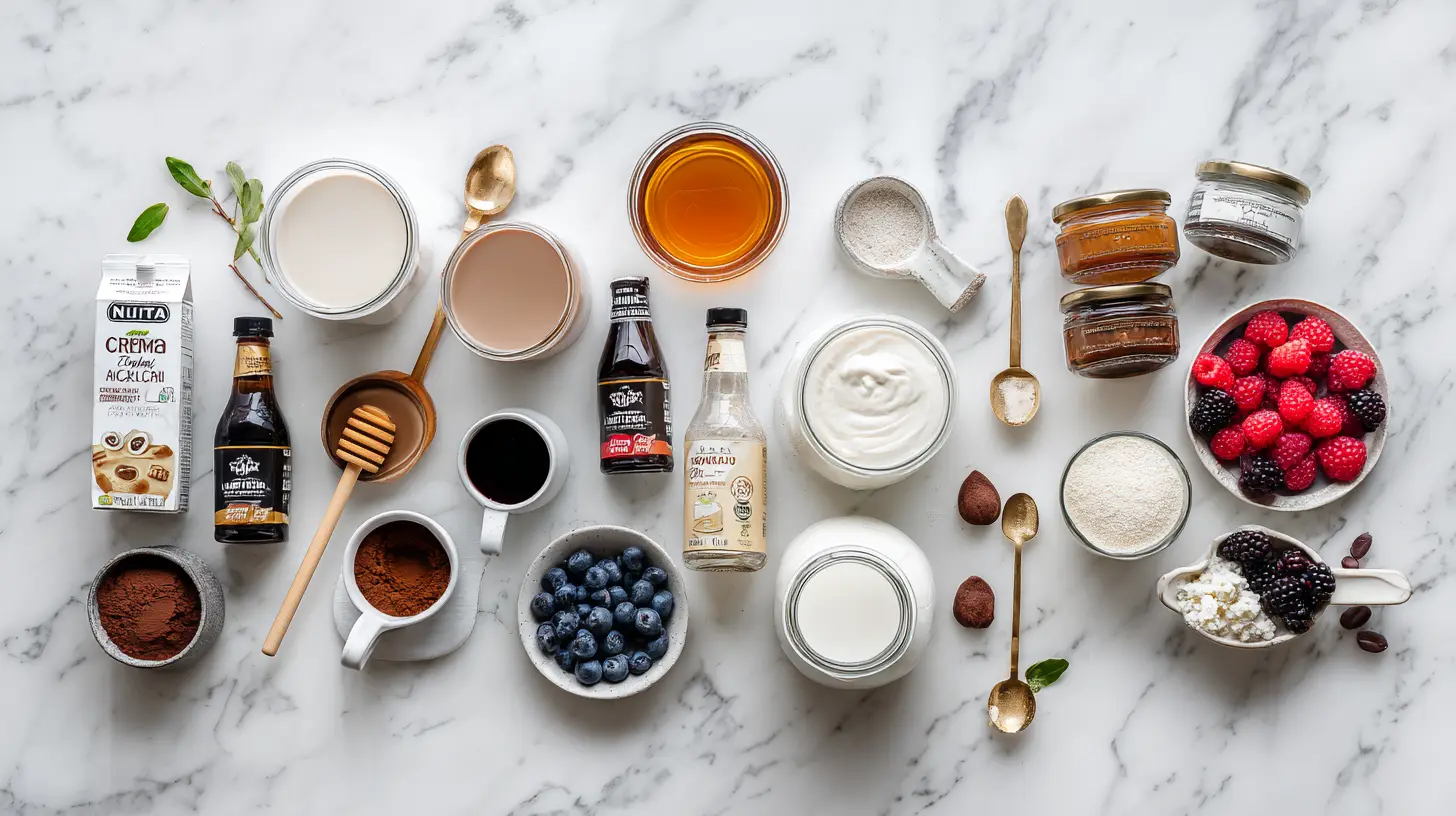
Base Ingredients That Make Ninja Creami Recipes Actually Taste Amazing
The absolute beauty of Ninja Creami recipes is how flexible they are with ingredients, which means you can work with whatever dietary restrictions, preferences, or random stuff you have in your fridge. Here’s what we keep stocked in our kitchen for our frozen dessert adventures:
- Dairy Options for Rich Results: Whole milk, heavy cream, Greek yogurt for that luxuriously rich, creamy base that makes everything taste indulgent
- Non-Dairy Alternatives for Everyone: Almond milk, coconut milk, oat milk for lactose-free treats or when we’re feeling experimental
- Natural Sweeteners That Actually Work: Honey, real maple syrup, agave, or even sugar substitutes for different dietary needs and flavor profiles
- Flavor Enhancers That Make Magic: Real vanilla extract (not that imitation stuff), high-quality cocoa powder, fruit purees—the possibilities are honestly endless
Experimenting with these ingredients has led to some of our most surprising and delicious discoveries. Don’t be afraid to try combinations that sound weird—some of our best Ninja Creami recipes came from happy accidents when we were just throwing stuff together to see what would happen.
Setting Up for Success (Lessons from My Epic First-Day Failure)
Getting started is honestly pretty straightforward, but let me share some hard-won wisdom from my first disastrous attempt. Make sure you have several pint containers with lids (seriously, buy extras because you’ll want to batch-make different flavors), invest in some decent measuring tools because precision actually matters more than I initially thought, and create a clean workspace where you can set everything up without feeling cramped.
Setting up the Ninja Creami itself is refreshingly simple. Place it on a stable surface where it won’t vibrate off during operation, make sure all the components are attached securely (check twice, trust me), and plug it in. The user manual is actually helpful, but the assembly is intuitive enough that you’ll probably figure most of it out just by looking at the pieces.
My Hard-Won Tips for Making Perfect Ninja Creami Recipes Every Single Time
After making what feels like hundreds of batches over the past year (the kids keep requesting new flavors, and Nicolas has developed some very specific preferences), I’ve learned some tricks that absolutely make the difference between good results and mind-blowing, “where has this been all my life” results. These aren’t in any manual, but they’re what separate the amateurs from the frozen dessert masters.
The Pre-Freezing Game-Changer (That I Learned the Hard Way)
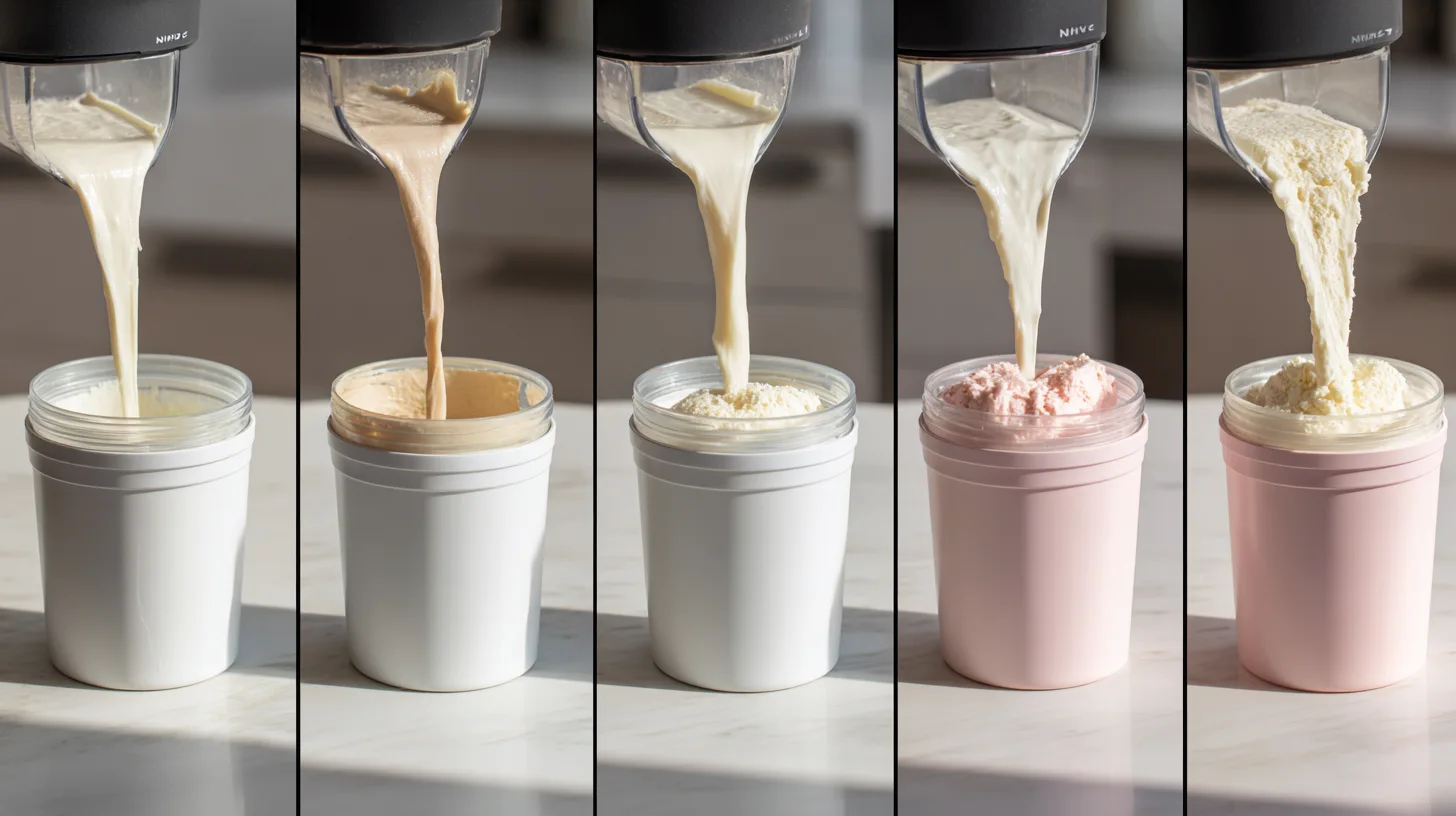
Here’s the most important tip I can possibly give you about Ninja Creami recipes, and I wish someone had grabbed me by the shoulders and explained this before my first attempt: proper pre-freezing is absolutely everything. Here’s what actually works, not just what sounds good in theory:
- Pour your carefully crafted mixture into the pint container, but resist the temptation to overfill—leave some room for expansion during freezing (I learned this when frozen mixture exploded all over my freezer like some kind of dessert volcano)
- Make sure that container is sealed tighter than a pickle jar and freeze it for a complete 24-hour period—yes, the full 24 hours, not 20, not 22, the entire day
- Keep the container on the flattest surface you can find in your freezer to maintain even consistency throughout the base
I know waiting 24 hours feels like torture when you’re excited to try your creation, especially when the house smells amazing from whatever you just mixed up. But this step is literally what makes the Ninja Creami capable of transforming your frozen block into creamy perfection instead of expensive disappointment.
Getting That Perfect, Instagram-Worthy Consistency Every Single Time
Want consistently amazing results that make your Ninja Creami recipes look like they came from an expensive gelato shop? Here’s what I’ve learned through trial, error, and a few batches that went straight into the garbage:
- Seriously don’t overfill those containers—I know I mentioned this already, but it bears repeating because the consequences are messy and heartbreaking
- If your dessert looks crumbly or grainy after the first spin, don’t panic and don’t give up! The “Re-spin” function is specifically designed to refine texture, and it works like magic
- Save any mix-ins like chocolate chips, crushed cookies, or nuts for after the initial processing—they’ll maintain their texture and integrity better that way
Following these guidelines consistently has transformed my frozen dessert game from “pretty decent for homemade” to “people actually ask me to bring dessert to parties.” And honestly, that’s saying something because I used to be the person who brought store-bought cookies and hoped nobody noticed.
Classic Ninja Creami Recipes That’ll Make You Famous in Your Neighborhood
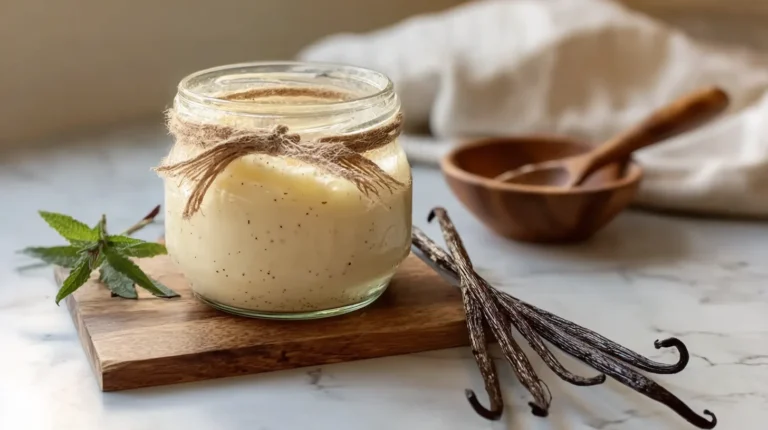
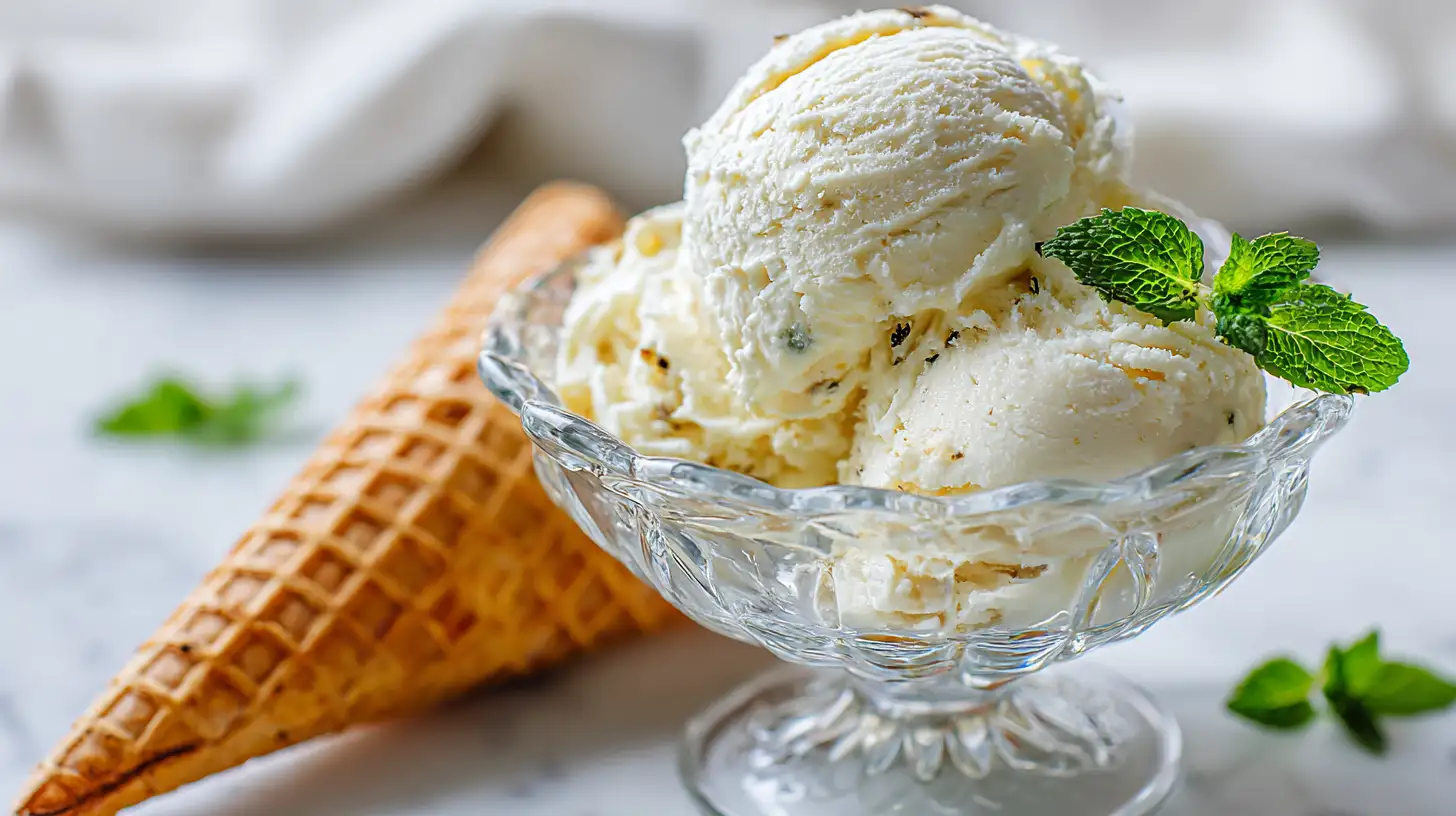
The Vanilla Ice Cream That Ruined Store-Bought for Me Forever
This vanilla ice cream recipe is honestly what made me a true believer in the Ninja Creami lifestyle. It’s so simple that you’ll wonder why you ever paid premium prices for the fancy stuff, but the results are just ridiculously, undeniably good. My mother-in-law, who’s notoriously difficult to impress, actually asked for the recipe after tasting it—twice.
What You Need (All Probably in Your Kitchen Right Now):
- 1 cup whole milk (don’t go low-fat here, trust me)
- 1 cup heavy cream (this is where the magic happens)
- 1/2 cup granulated sugar
- 1 tsp real vanilla extract (please don’t use the imitation stuff; your taste buds will thank you)
The Simple Process That Creates Magic:
- Whisk together milk, cream, and sugar in a bowl until that sugar completely dissolves—no gritty bits allowed
- Add vanilla and mix it in thoroughly, making sure it’s evenly distributed
- Pour into your pint container, making sure to stay below that fill line
- Seal it up tight and freeze for exactly 24 hours on the flattest surface in your freezer
- Process using the “Ice Cream” setting and prepare to have your mind completely blown
- Serve immediately for soft-serve consistency, or store for firmer scoops later
Ways to Make It Your Own: Once you’ve mastered this base, the world is your oyster. Add mini chocolate chips for cookies and cream vibes, swirl in caramel for salted caramel perfection, or swap vanilla for almond extract for something sophisticated. You can even use honey instead of sugar for a more natural sweetness that pairs beautifully with fresh fruit.
Chocolate Gelato That Rivals Anything You’ve Had in Italy
This chocolate gelato is so rich and decadent, it’s almost embarrassing how easy it is to make. Nicolas, who lived in Italy for a semester in college and considers himself something of a gelato connoisseur, actually said this surpasses anything he had in Rome. Coming from him, that’s basically the highest compliment possible.
Ingredients for Pure Chocolate Bliss:
- 1 cup whole milk
- 3/4 cup heavy cream
- 1/2 cup unsweetened cocoa powder (seriously invest in the good stuff here)
- 1/2 cup granulated sugar
- 1/4 tsp salt (this enhances the chocolate flavor in ways you can’t imagine)
- 1/2 tsp vanilla extract
The Process That Creates Chocolate Heaven:
- Gently heat milk, cocoa powder, sugar, and salt in a saucepan over medium-low heat, whisking constantly until everything dissolves into smooth perfection—absolutely do not let it boil!
- Remove from heat and let the mixture cool completely to room temperature (patience is crucial here, even though it smells incredible)
- Stir in heavy cream and vanilla extract until everything’s beautifully combined
- Pour into your container, staying below that crucial fill line
- Freeze for the full 24 hours without peeking (I know it’s tempting)
- Process with the “Gelato” setting and try to save some for other people
Pro Tips for Gelato Perfection: Make absolutely sure your mixture is completely cool before freezing—warm mixtures create ice crystals that ruin the smooth texture. If it looks slightly grainy after the first spin, the “Re-spin” function will fix that right up. And seriously, don’t skimp on the cocoa powder quality—it makes a world of difference in the final result.
Healthy Ninja Creami Recipes That Don’t Taste Like You’re Being Punished
Almond Milk Vanilla That Converted Our Whole Family
I’ll be completely honest with you—I was skeptical about dairy-free Ninja Creami recipes at first. I thought they’d taste like sad, watery imitations of the real thing. But this almond milk version is so creamy and satisfying that even our die-hard dairy lovers can’t tell the difference. It’s become our go-to when we want something lighter but still indulgent.
Simple Ingredients That Create Magic:
- 1 cup unsweetened almond milk
- 1/4 cup smooth almond butter (make sure it’s well-stirred)
- 1/3 cup pure maple syrup
- 1 tsp vanilla extract
The Easy Process:
- Whisk everything together until completely smooth—no lumps of almond butter hiding in there
- Pour into container and freeze for the magic 24-hour period
- Use the “Lite Ice Cream” setting and enjoy your guilt-free creation
Try adding chopped toasted almonds or mini dark chocolate chips as mix-ins after processing, or experiment with cashew milk or oat milk for different flavor profiles. Each one brings something unique to the table.
Tropical Coconut Mango Sorbet (AKA Vacation in a Bowl)
This sorbet is honestly like taking a mini vacation without leaving your kitchen, and it’s one of those Ninja Creami recipes that makes people think you’re way more sophisticated than you actually are. The combination of creamy coconut and sweet mango is just pure happiness in frozen form.
Tropical Paradise Ingredients:
- 1 cup coconut cream (the thick stuff from the top of the can)
- 1 cup fresh mango chunks (make sure they’re perfectly ripe for maximum sweetness)
- 2 tbsp honey (optional, but I usually add it because I have a sweet tooth)
Easy Island Method:
- Blend everything in a regular blender until completely smooth and gorgeous
- Pour into a container and freeze for 24 hours while dreaming of tropical beaches
- Process with the “Sorbet” setting
- Serve immediately and transport yourself somewhere warm and sunny
Success Tips from Experience: Make sure your mangoes are at that perfect ripeness where they smell amazing and give slightly when pressed. Add a splash of fresh lime juice if you want a little tangy brightness that makes all the flavors pop.
Low-Calorie and Sugar-Free Ninja Creami Recipes for Guilt-Free Indulgence
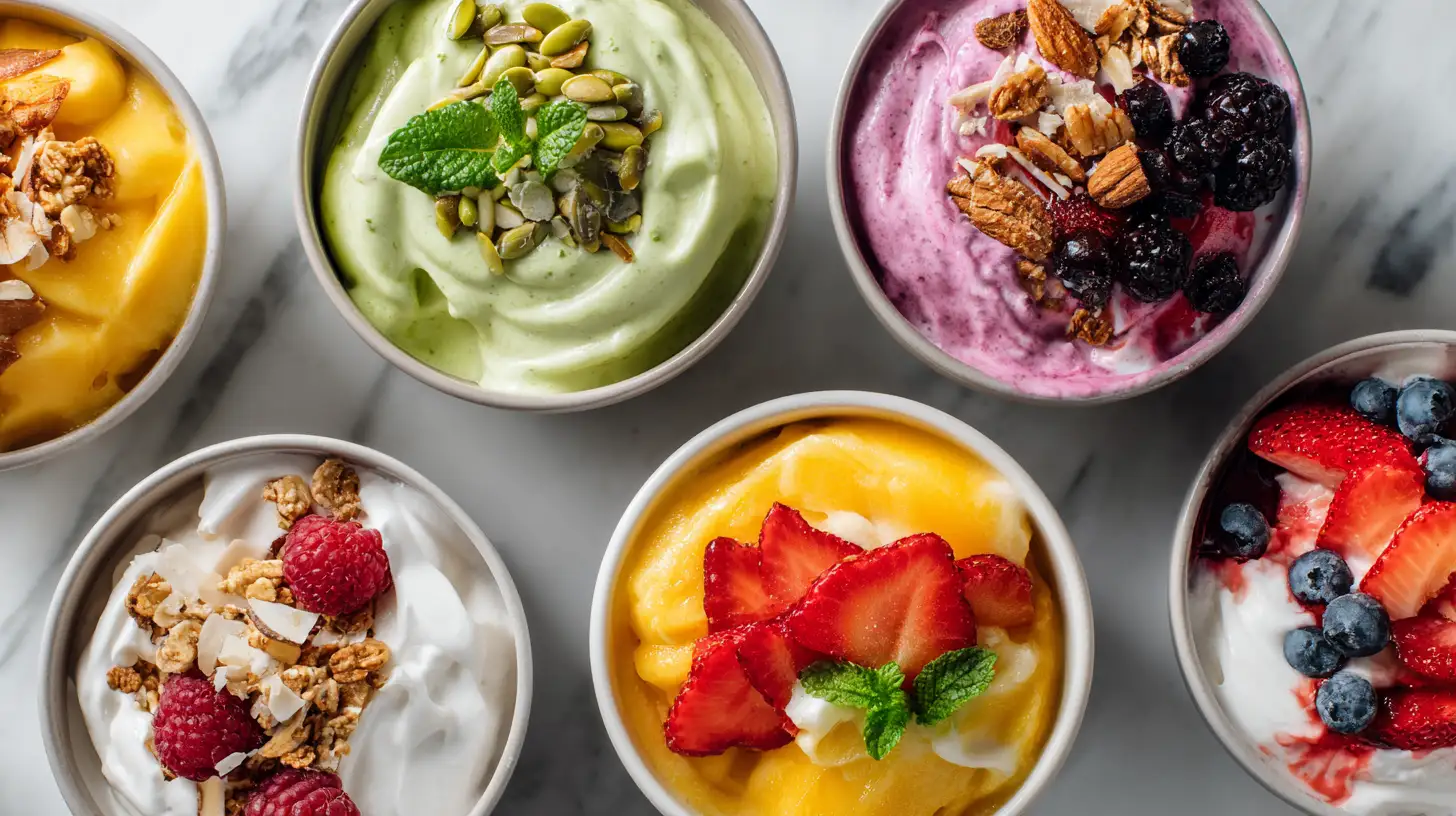
Greek Yogurt Berry Froyo That Actually Satisfies Your Sweet Tooth
This Greek yogurt froyo has become one of our absolute favorite Ninja Creami recipes for those times when we want something sweet and satisfying but not so heavy that we need to unbutton our pants afterward. It’s packed with protein, loaded with antioxidants from the berries, and tastes way better than anything you can buy at those expensive frozen yogurt shops.
Protein-Packed Ingredients:
- 1 cup plain Greek yogurt (go for the full-fat version for best texture)
- 1/2 cup mixed berries (whatever’s in season or looking good at the store)
- 2 tbsp honey or your favorite sugar-free sweetener
Blend everything until smooth, freeze for 24 hours, and process with “Lite Ice Cream.” Add fresh berry pieces after processing for extra bursts of flavor and beautiful color contrast. The kids love helping pick out different berry combinations, and it’s become a fun weekend activity for us.
Keto Peanut Butter Ice Cream That Nicolas Can’t Stop Talking About
Nicolas has been doing keto for the past year, which means I’ve become an expert at creating desserts that won’t kick him out of ketosis. This peanut butter ice cream has become his absolute favorite Ninja Creami recipe because it satisfies his sweet tooth while keeping him on track with his eating plan. Plus, it tastes so good that the rest of us fight over it too.
Keto-Friendly Dream Ingredients:
- 1 cup unsweetened almond milk
- 1/2 cup heavy cream
- 1/3 cup natural peanut butter (make sure it’s sugar-free)
- 1/4 cup powdered erythritol
- 1/2 tsp vanilla extract
Whisk everything until perfectly smooth, freeze for 24 hours, then process with the “Lite Ice Cream” or “Gelato” setting. Make absolutely sure your peanut butter is smooth and sugar-free for the best results. Nicolas likes to add a few sugar-free chocolate chips as mix-ins, which makes it taste like a frozen Reese’s cup.
Gourmet Ninja Creami Recipes for When You Want to Show Off
Lavender Honey Gelato (Fancy But Surprisingly Simple)
This lavender honey gelato sounds intimidating, but it’s actually one of the easier Ninja Creami recipes to master. It’s perfect when you want to serve something that makes guests think you spent all day in the kitchen, when really you just threw some ingredients together and let the machine do the work. The girls were skeptical at first, but now they request it for special occasions.
Sophisticated Ingredients:
- 1 cup whole milk
- 3/4 cup heavy cream
- 1/3 cup good quality honey
- 1 tsp dried culinary lavender (make sure it’s food-grade!)
- 1/4 tsp vanilla extract
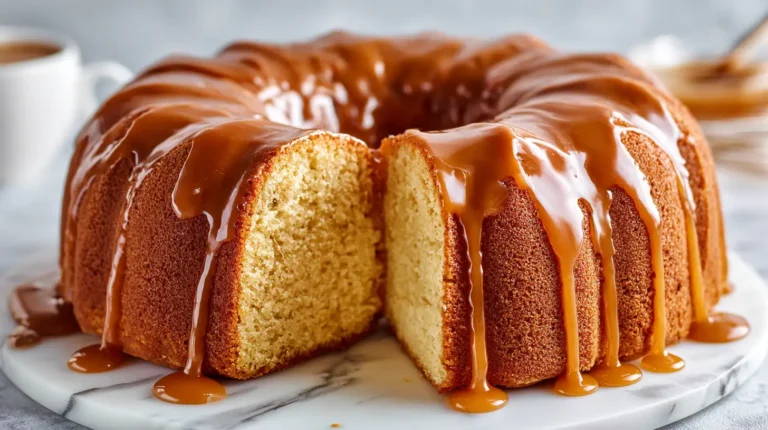
Heat milk, cream, and honey until honey dissolves; steep with lavender for 5 minutes off the heat; strain out every bit of lavender; cool completely; add vanilla; freeze for 24 hours; and process with the “Gelato” setting. The result is elegant, aromatic, and absolutely perfect with our lemon pound cake for a sophisticated dessert pairing.

Seasonal Holiday Ninja Creami Recipes That Create Family Traditions
Pumpkin Spice Ice Cream for Fall Feelings
This pumpkin spice ice cream captures every single cozy fall feeling and puts it into frozen form. It’s become our October tradition, and honestly, the kids ask for it year-round now because it tastes like autumn happiness. Even Nicolas, who claims to hate “seasonal flavors,” admits this one is pretty spectacular.
Fall-Perfect Ingredients:
- 1 cup whole milk
- 1 cup heavy cream
- 1/3 cup pure pumpkin puree (not pumpkin pie filling!)
- 1/4 cup brown sugar
- 1 tsp pumpkin spice
- 1/2 tsp vanilla extract
Whisk everything together until completely smooth and beautifully orange, freeze for 24 hours while your house starts smelling like autumn, process with the “Ice Cream” setting, and top with crushed gingersnap cookies or a dollop of whipped cream for the full fall experience. Pair it with our pumpkin spice pancakes for the ultimate autumn breakfast dessert that makes everyone happy!
Peppermint Bark Gelato for Holiday Magic
This holiday gelato brings every Christmas feeling into one incredible frozen treat. It’s become our December tradition, and making it fills the house with the most amazing peppermint aroma that immediately puts everyone in the holiday spirit.
Holiday Magic Ingredients:
- 1 cup whole milk
- 3/4 cup heavy cream
- 1/4 cup sugar
- 1/2 tsp peppermint extract (start with less; you can always add more)
- 1/4 cup crushed candy canes
- 1/4 cup dark chocolate chunks
Mix milk, cream, sugar, and peppermint extract, freeze for 24 hours, process with the “Gelato” setting, then fold in the crushed peppermint and chocolate chunks. It’s like Christmas morning in a bowl, and it makes the perfect ending to holiday dinners.
Your Ninja Creami Recipes Questions Answered (From Someone Who’s Made Every Mistake)
How long should I really pre-freeze my base, and why does it matter so much?
The honest, no-nonsense answer? A complete 24 hours, and I know that feels like an eternity when you’re excited to try your creation and the anticipation is killing you. But I’ve tried every shortcut possible, and they just don’t work nearly as well. The machine needs that solid frozen base to work properly, and freezing on a flat surface in the pint container gives you the most consistent, professional results every single time with your Ninja Creami recipes.
Can I really use non-dairy milk alternatives and get good results?
Absolutely, positively yes! Non-dairy alternatives like almond, coconut, and oat milk work beautifully in Ninja Creami recipes, and sometimes they even create more interesting flavors than traditional dairy. Just remember that higher fat content options like coconut milk will give you creamier, richer results than lighter alternatives. I’ve had amazing success with all types, so don’t be afraid to experiment based on your dietary needs or just because you want to try something different.
What’s the real deal with portion sizes, and why can’t I fill the container all the way?
The pint container has a maximum fill line that you absolutely, positively should not exceed, and I’m speaking from messy experience here. When I first started making Ninja Creami recipes, I thought, “A little extra won’t hurt,” and I ended up with a frozen mixture exploding all over my freezer like some kind of dessert volcano. Leave space for expansion during freezing, and your recipes will process much more evenly and successfully.
Are there ingredients I should completely avoid to prevent disasters?
Yes, there are definitely some things that can completely mess up your Ninja Creami recipes, and I’ve learned about most of them the hard way. Avoid high alcohol content because it prevents proper freezing and creates a slushy mess. Don’t add large chunks of ingredients like whole nuts or big pieces of candy before processing—save those for mix-ins afterward. And be really careful with super watery bases because they can create icy, grainy textures instead of the smooth creaminess we’re after.
What if my first few attempts don’t turn out perfectly?
Don’t get discouraged, and don’t give up! My first several Ninja Creami recipes were honestly pretty mediocre, and there were a couple that went straight from the machine to the garbage disposal. It takes a little practice to understand ingredient ratios, timing, and how your specific machine behaves. Keep detailed notes about what you tried, adjust ingredients based on the results, and you’ll be making incredible frozen treats that impress everyone in no time at all.
Why These Ninja Creami Recipes Will Completely Transform Your Dessert Game
Here’s what I really want you to understand about making your own frozen desserts: it’s not just about saving money (though you definitely will) or creating healthier options (though that’s a fantastic benefit). It’s about the pure satisfaction of creating something from scratch that tastes infinitely better than anything you can buy and the joy of watching your family’s faces light up when they taste something you made with your own hands.
The Ninja Creami makes the entire process so accessible and genuinely enjoyable that you’ll find yourself constantly experimenting with new flavor combinations you never would have thought to try before. These Ninja Creami recipes give you complete freedom from whatever limited options happen to be available at the store—you can create exactly what you’re craving, when you’re craving it.
From classic vanilla that brings back the best childhood memories to completely exotic flavor combinations that surprise and delight everyone who tries them, there’s literally no limit to what you can create. The health benefits are real and significant, the customization possibilities are endless, and the results are consistently amazing once you get the hang of it.
Whether you’re following a specific diet, dealing with food allergies like we are, or just want to have more fun and creativity in your kitchen, these recipes offer something special for everyone in your family. Don’t hesitate to experiment, modify ingredients to suit your preferences, and make each recipe uniquely your own.
Ready to explore even more amazing homemade treats that pair perfectly with your new frozen dessert skills? Check out our protein-packed breakfast options for balance, our refreshing summer drinks for variety, and our collection of healthy alternatives that complement these indulgent treats perfectly!