Hey there! Nicolas here, and I’ll be completely honest with you-three years ago, if someone had told me I’d be making homemade sushi, I would’ve laughed out loud. Me? The guy who burns toast? Making those perfect little rice rolls? No way.
But here I am, writing this after just finishing an amazing homemade sushi dinner that cost us about $18 and would’ve easily run $75-80 at our local sushi spot. And the best part? This homemade sushi was absolutely delicious, completely customized to our tastes, and way more fun than any restaurant experience.
Let me tell you how this whole adventure started. Valentine’s Day 2019 – Nora and I were looking at sushi restaurant prices in our area. $65-80 for two people, just for some rice and fish! That’s when Nora had this wild idea: “What if we just made it ourselves?” I probably laughed. I definitely worried. But honestly? Best cooking decision we ever made.
Looking for more international flavors? Explore our complete World Cuisine collection for authentic recipes from every continent.
Quick Homemade Sushi
Equipment
- Bamboo Rolling Mat
- Sharp Knife
- Rice Paddle
Ingredients
Sushi Roll Ingredients
- 6 sheets sushi seaweed (nori)
- 2 cups prepared sushi rice short-grain, seasoned
- 0.5 lb sashimi-grade salmon or filling of choice
- 4 oz cream cheese sliced into strips
- 1 avocado sliced
- soy sauce for serving
Instructions
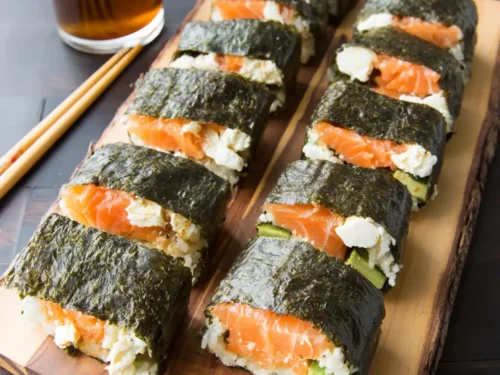
- Place a sheet of seaweed shiny side down on your bamboo rolling mat. Spread an even layer of sushi rice over 3/4 of the nori, using wet hands or a rice paddle.
- Layer your choice of fillings – salmon, cream cheese, avocado – across the center of the rice.
- Roll the sushi tightly using the bamboo mat, tucking gently as you go to form a tight roll.
- Use a sharp knife to slice the roll into even pieces. Wipe the knife between cuts for clean slices.
- Serve immediately with soy sauce, pickled ginger, and wasabi if desired.
Notes
What You’ll Learn About Homemade Sushi (in 5 Minutes)
- Real savings: $15-20 at home vs. $40-80+ at restaurants.
- Homemade sushi skill level: If you can spread butter on bread, you can make sushi.
- Time investment: About 30 minutes once you get the hang of it.
- Fun factor: Off the charts (seriously, try it once).
- Homemade sushi customization: Finally, sushi rolls with exactly what YOU want inside.
Homemade Sushi vs. Restaurant: Let’s Get Real
Here’s what I wish someone had told me before we started: your homemade sushi will never look like those perfect Instagram photos from high-end restaurants. And you know what? That’s completely fine.
Professional sushi chefs spend years perfecting their rice technique and knife skills. We’re just trying to make delicious homemade sushi without breaking the bank or leaving the house. Different goals, different expectations.
Where homemade sushi absolutely wins:
The cost savings are honestly incredible. Last week, I bought a half-pound of sushi-grade salmon for $16. The same amount of salmon in restaurant rolls would’ve cost us easily $50-60. Plus, when making homemade sushi, you get to pile on as much avocado as your heart desires (and mine desires a lot).
But beyond the money – and this might sound cheesy – there’s something really special about making homemade sushi. It’s become our go-to for date nights, celebrations, or just when we want to try something different for dinner. It turns an ordinary evening into something memorable.
Getting Started: What You Actually Need (No Fancy Equipment Required)
When we first decided to try this, I went down a rabbit hole of “essential sushi equipment.” Don’t make my mistake. Here’s what you actually need:
The Must-Haves:
- Nori sheets: Look for packages that say sushi “nori” – usually in the Asian food aisle.
- Short-grain rice: This is crucial. Long-grain rice just won’t stick properly (learned this the hard way).
- Sharp knife: Whatever’s the sharpest in your kitchen will work.
- Bamboo rolling mat: About $5 at most grocery stores or online.
The Nice-to-Haves:
- Rice paddle (a regular spoon works fine)
- Small bowl of water for your hands
- Clean kitchen towel
A Quick Word About Fish (Don’t Panic)
Yes, you can absolutely make excellent sushi without raw fish! Some of our favorite rolls are
- Philadelphia rolls: Smoked salmon, cream cheese, avocado, cucumber
- California rolls: Imitation crab (or real crab if you’re feeling fancy)
- Veggie rolls: Avocado, cucumber, and carrots – surprisingly satisfying
- Shrimp tempura rolls: Cooked shrimp, totally beginner-friendly
If you do want to try raw fish, just ask your fishmonger for “sashimi-grade” or “sushi-grade” fish. They’ll know exactly what you mean, and most decent fish markets carry it.
The Rice: Your Foundation for Success
Okay, let’s talk about sushi rice. This was my biggest worry starting out, but it’s honestly not as complicated as YouTube makes it seem.
Nicolas’s No-Stress Rice Method:
Use your rice cooker if you have one – it takes all the guesswork out. Cook short-grain rice according to package directions, then while it’s still warm (but not hot), gently fold in some seasoned rice vinegar. You can buy this pre-made or make your own with rice vinegar, a little sugar, and a pinch of salt.
The rice should be slightly warm and just sticky enough to hold together. If it’s too hot, it’ll make your nori soggy. If it’s too cold, it becomes hard and uncooperative. Room temperature is your sweet spot.
Assembly Time: Where the Magic Happens
This is where it gets fun. I remember our first attempt – we had rice everywhere, the nori tore, and our “rolls” looked more like sad burritos. But we laughed so hard, and honestly? They still tasted amazing.
Step-by-Step (The Way That Actually Works):
1. Prep your workspace: Lay out your bamboo mat, have a small bowl of water nearby for your hands, and get all your fillings ready. Trust me, you don’t want to be searching for ingredients with sticky hands.
2. Place the nori: Shiny side down on the bamboo mat. This was a game-changer tip we learned – if there’s a shinier side, that goes on the outside of your roll.


3. Spread the rice: Wet your hands (this prevents sticking), then gently spread rice over about 3/4 of the nori sheet. Don’t press too hard – you’re not making rice pancakes.

4. Add your fillings: Less is more here. I learned this after creating a roll so stuffed it exploded when I tried to cut it. A few strips of salmon, some avocado slices, maybe a little cream cheese – that’s plenty.

5. Roll it up: This is where the bamboo mat earns its keep. Start from the filled edge, use the mat to help you roll tightly, and tuck as you go. Don’t overthink it.
")
6. Cut with confidence: Use your sharpest knife, and don’t saw back and forth. One clean slice down. Wipe the knife clean between cuts.


Let’s Talk Money (The Real Numbers)
Remember that $16 piece of salmon I mentioned? That gave us enough fish for six rolls, plus some extra for snacking. Add in the cost of rice, nori, and avocado, and we’re looking at about $20 total for a sushi dinner that would easily cost $60-80 at a restaurant.
Here’s a real breakdown from our last sushi night:
- ½ lb sushi-grade salmon: $16
- Nori sheets (pack of 10): $4
- Sushi rice + vinegar: $2
- 1 avocado: $1.50
- Cream cheese: $1
Total: $24.50 for 6 large rolls (3-4 servings)
The same amount at our local sushi restaurant would run about $70-85. Even at a casual spot, we’re looking at $45-55 minimum. And here’s the thing – when it’s your sushi, you control the portions. Want extra salmon? Go for it. Love avocado? Pile it on.
What to Serve Alongside (The Full Experience)
Don’t forget the classics: soy sauce, pickled ginger, and wasabi. You can find these at most grocery stores now, and they really complete the experience.
We also like to make it a full evening – maybe start with some edamame, have the sushi as the main event, and finish with something simple like fresh fruit. There’s something magical about transforming an ordinary weeknight into your own private Japanese restaurant experience.
Common Beginner Mistakes (And How to Dodge Them)
Stuffing your rolls like a burrito: I totally understand wanting to pack in those premium ingredients. But trust me, less is more. You can always make another roll.
Using rice that’s too hot: Let it cool to room temperature. Hot rice = soggy nori = frustration.
Not wetting your hands: Rice will stick to everything if your hands aren’t slightly damp. Keep that water bowl handy.
Being too precious about appearance: Your first rolls might look wonky. That’s totally normal, and they’ll still taste incredible.
The Truth About Leftovers
Let me be straight with you: sushi doesn’t keep well. The rice turns into little hard pellets in the fridge, and with raw fish, you’re playing with food safety. Plan to eat whatever you make that same day.
But here’s a pro tip: you can prep all your ingredients ahead of time. Cook the rice, slice your fish and veggies, and when you’re ready to eat, assembly takes maybe 15 minutes.
Making It Your Own
Once you get comfortable with the basics, this is where the real fun begins. We’ve experimented with all kinds of combinations:
- Teriyaki chicken and cucumber
- Smoked salmon with cream cheese and capers
- Even a “breakfast roll” with scrambled egg and avocado
- Spicy tuna with sriracha mayo
- Veggie rolls with bell pepper and carrot
The beauty of making sushi at home is that you can be as creative (or as traditional) as you want. No judgment, no “that’s not authentic” – just delicious food made your way.
Final Thoughts from Someone Who Was Once Terrified
Look, I’m not going to lie and say our homemade sushi looks like it belongs in a high-end restaurant. But you know what it does have? It has heart, it brings people together, and it proves that you don’t need to be a professional chef to create something really special at home.
Plus, there’s something deeply satisfying about mastering a skill that seems intimidating at first. Every time we make sushi now, I remember that first Valentine’s Day when we had no idea what we were doing but decided to try anyway.
The savings are real – we’re talking about $40-60 saved per sushi night. But honestly, it’s turned into so much more than just saving money. It’s become this ritual we actually look forward to – rolling, laughing when things go sideways, and ending up with something that tastes exactly the way we want it.
Want to jump in? Keep it simple to start – pick up some cooked shrimp or smoked salmon for your first go. Get the hang of rolling, then let your creativity run wild. And seriously, if you end up making sushi at home, drop me a line! It’s always exciting to hear about other people’s kitchen adventures.
Happy rolling!
Nicolas (with Nora supervising from the living room)–
Love this recipe? You’ll find more just like it on my Facebook and Pinterest pages.
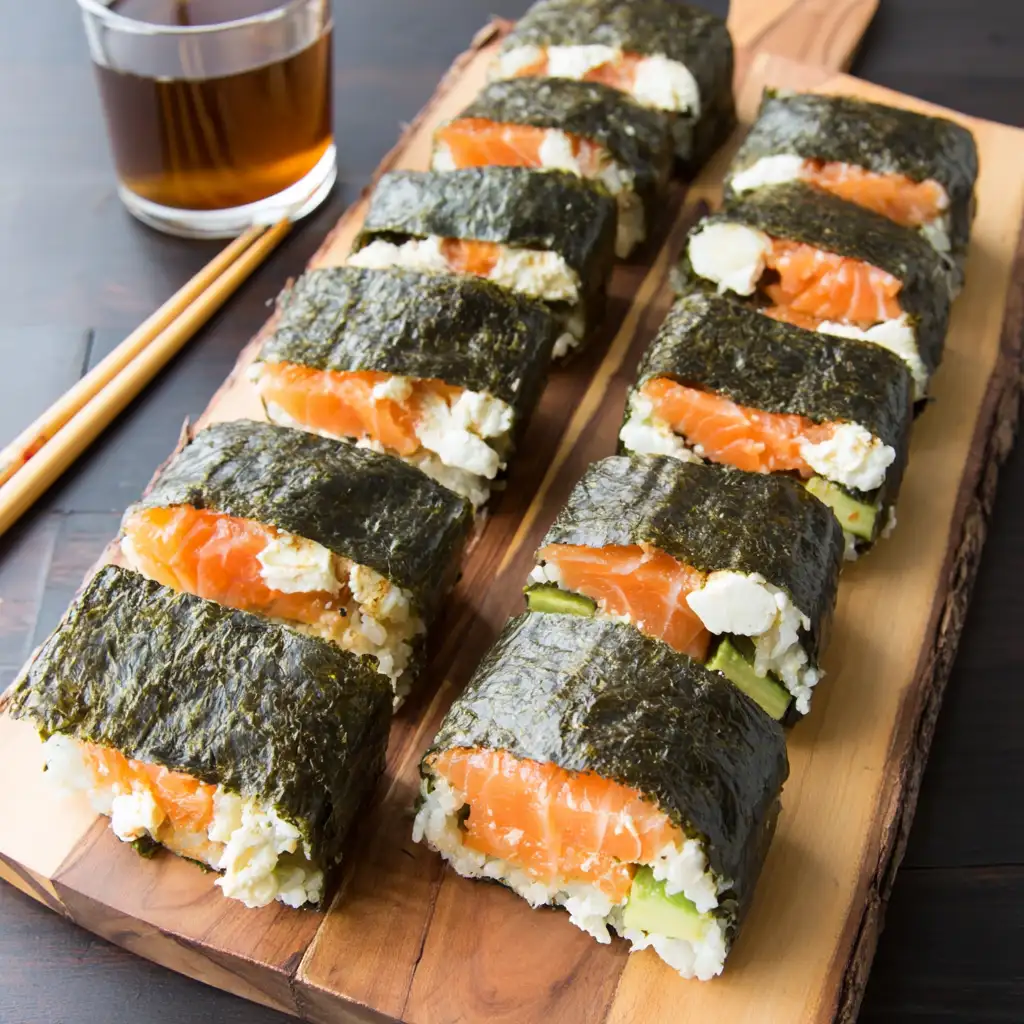
Quick Homemade Sushi Recipe
Prep Time: 15 minutes | Total Time: 15 minutes | Serves: 6 rolls
Ingredients
- 6 sheets of sushi seaweed (nori)
- 1 batch prepared sushi rice (about 2 cups cooked)
- ½ lb sashimi-grade salmon (or your choice of filling)
- 4 oz cream cheese, sliced into strips
- 1 avocado, sliced
- Soy sauce, for serving
Instructions
- Place seaweed on bamboo mat, cover with even layer of prepared sushi rice. Smooth gently with a rice paddle.
- Layer salmon, cream cheese, and avocado on the rice, and roll up tightly using the mat.
- Slice with a sharp knife, wiping clean between cuts. Dig in right away with soy sauce!
Notes
- Storage: Don’t save these – sushi goes bad fast, especially the raw stuff.
- Beginner tip: Nervous about raw fish? Stick with cooked shrimp or smoked salmon for now.
- Cost savings: You’ll feed 2-3 people for around $20 instead of $60-80 eating out.
- Customization: Make it yours – throw in whatever sounds good to you!